
Converting a Knitting Pattern into a Weaving Pattern - Part 1
By Stephanie Flynn Sokolov
Weaving is so fast. At least that is what I tell new weavers (and myself) when it comes to committing to a project. Why would I knit it when I could weave it in less than half the time? Now is the time for me to put the money where the loom is.
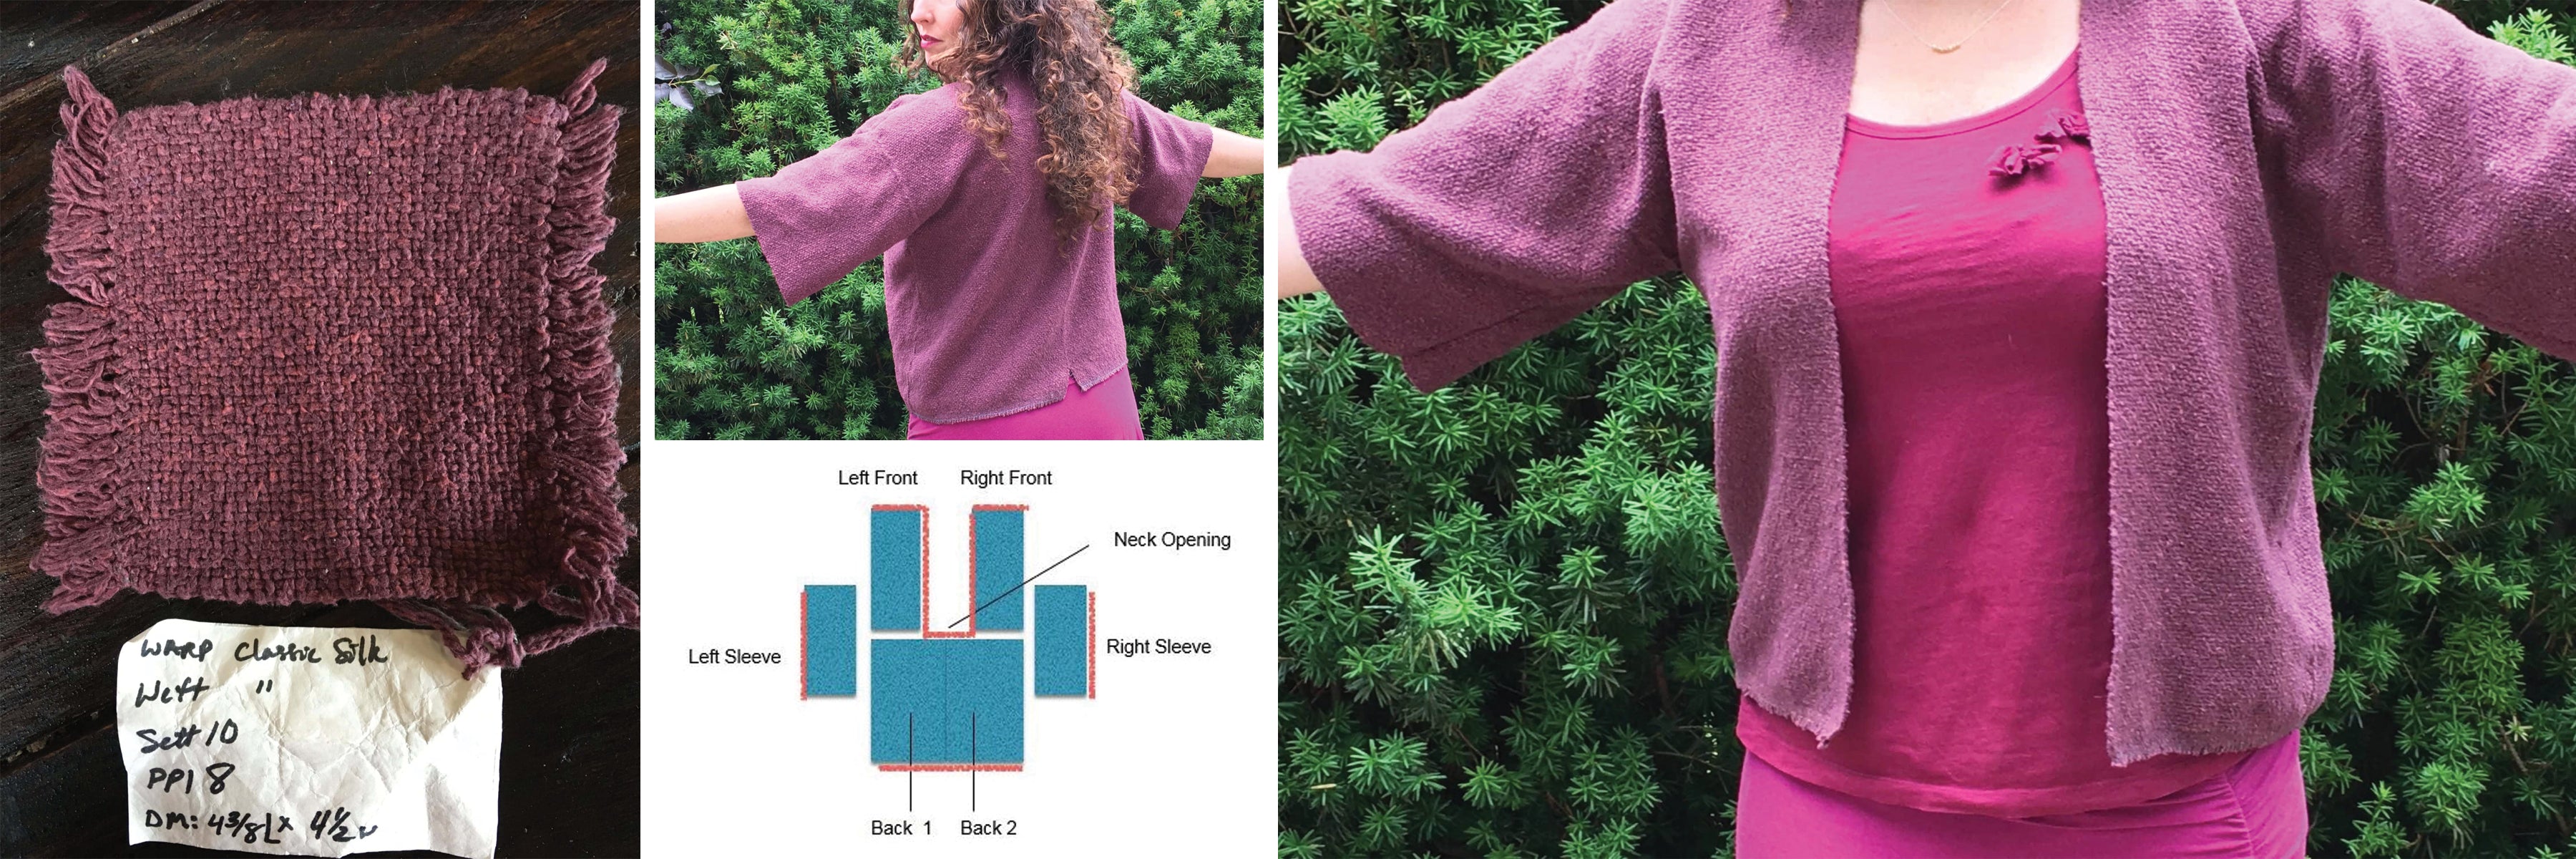
Recently, I unearthed a knitting pattern for a kimono purchased years ago with the intended yarn, Classic Silk, in a bag ready to go. Looking at the pattern it occurred to me why I had never cast on: too much knitting. But, after looking at the pattern and realizing that all the pieces were rectangles, it struck me that this was the perfect knitting project to convert to weaving.
The first big question was whether I would have enough yarn. Since the pattern and the yarn had been purchased years ago, the likelihood of finding the same dye lot was bleak. In order to determine the amount of yarn I would need I first needed to sample. After doing a yarn wrapping (16 wpi), I determined that I would first try a 10-dent reed.
The fabric that I was aiming for was something soft and supple, but firm with a little give. This was my reasoning for starting with the 10-dent reed instead of an 8-dent which would be the usual starting point with a 16 wpi yield (16 wraps per inch divided by 2 = 8). I thought that if I sampled different beats in plain weave, hopefully I would hit my mark on the first try.
What You'll Need
-
945 yards Classic Elite Classic Silk (7 skeins) for fabric
-
Habu Wool Crepe, color C3004 (100% Merino wool, 747 yard per 28 g or 1 oz) for trim
-
matching sewing thread
-
15” Cricket Loom
-
10 dent reed
-
2 stick shuttles
-
tapestry needle
-
sewing machine
Materials
Equipment
Directions
Sampling
Warping the loom with 36" warp length, 5” wide gave me enough length to sample 4 variations. First, I beat the weft densely at 17 picks per inch (ppi) using the same yarn as the warp. After just a little weaving, I knew it was too firm. Next, I tried 10 ppi, then 8 ppi and finally, I tried a favorite yarn, Habu wool crepe. This very fine, over-twisted yarn beat in at 25 ppi. After washing and drying the sample, the 8 ppi was my favorite, followed by the Habu wool crepe.
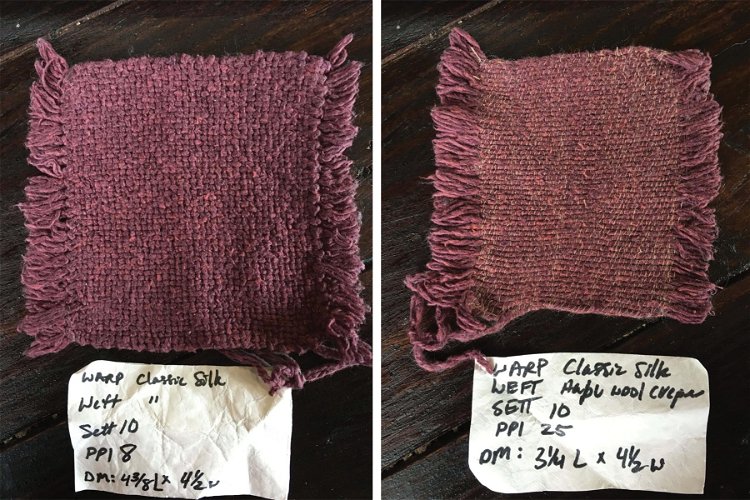
This is often how I arrive at my setts and beat samples. If you keep records of your samples, you may find one that didn’t make the cut for this project but would be a great start for a different project later on.
Planning and Weaving
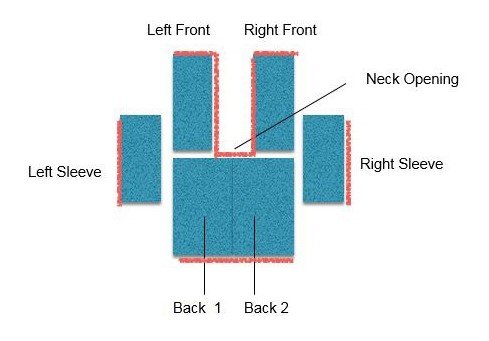
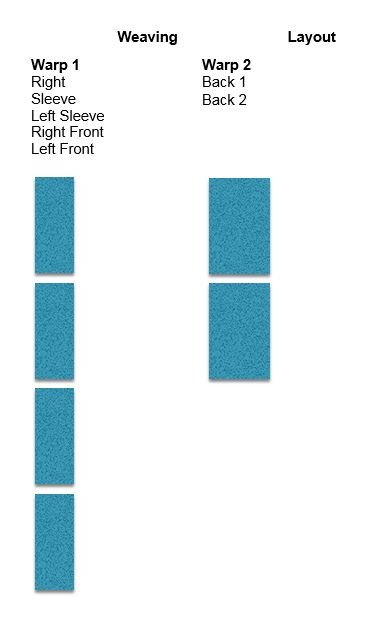
A kimono garment shape is a great place to start if you are fearful of cutting into your handwoven fabric. When converting a knitting pattern to weaving, you first need to convert each pattern piece in your size to the correct finished dimensions as indicated on your pattern. The Kimono Layout here shows how I planned my project.
Now you need to think (yikes, sometimes it hurts). Plan your woven pieces to take into account take-up, draw-in, and shrinkage in both the warp and weft, easy if you made a sample. For example, if you know your sample shrank 11.5% in length, you will need to weave your piece 11.5% longer than the finished piece before washing. The same holds true for the width.
Making all these little calculations allowed me to weave the back (in two pieces), the right front, left front and both sleeves on only two warps.
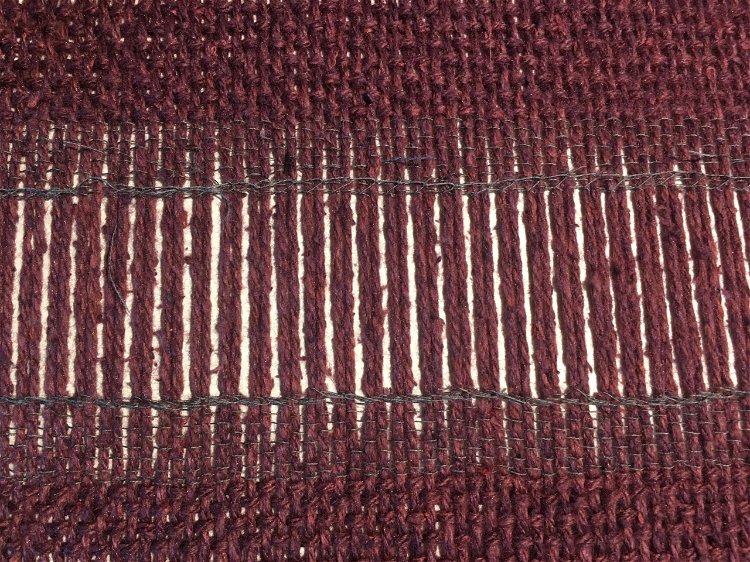
When weaving multiple pieces on the same warp, the space in between the pieces needs to be taken into account and prepared for finishing the raw ends.
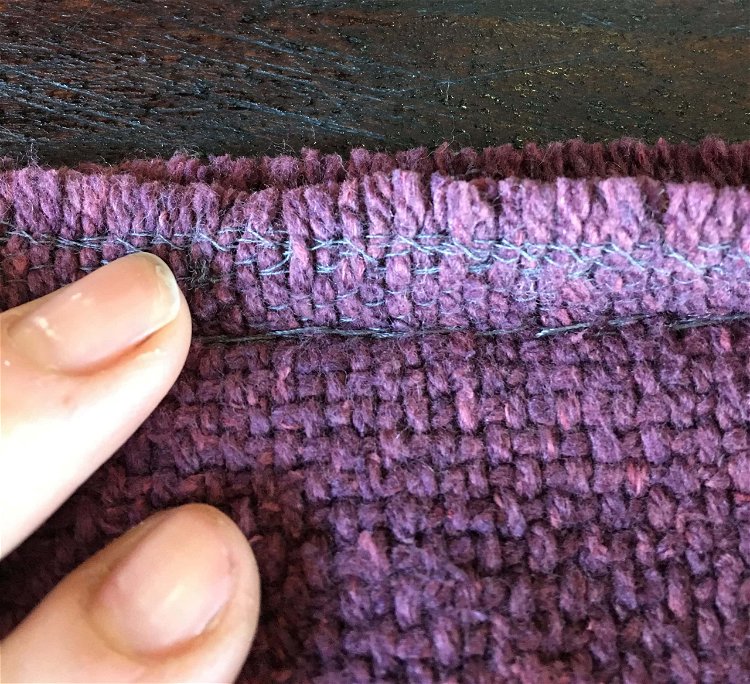
Hint: Reduce bulk by using a very fine yarn or thread at the beginning and end of each piece with hemstitching. This is very helpful when sewing together the shoulder seams and underneath the sleeves.
The first warp was 118" long and 10" wide (total 100 warp ends). I wove two pieces each at 22 1/4" long and two pieces each 25 1/2" long with only 20" allowed for take-up and loom waste (so you'll need to economize when you tie on your warp and weave as far as you can on the loom). The second warp was 66" long and 13 1/4" wide (total 132 warp ends) with 15" for take up and loom waste. My finished pieces measured as follows: sleeves—9" x 20", fronts—9" x 23" and two back pieces—12" x 23".
Once all your pieces are woven, wash and dry them the same way you did your sample.
Assembly
Now, assemble your pieces as your pattern dictates. Like a traditional kimono, there is a trim that runs up the front to become the neckband and trim on the bottom of the sleeves. I'll cover weaving the trim (shown in red on the Kimono Layout above) and finishing next month in part 2.
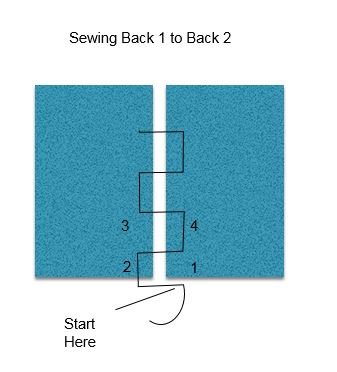
- I sewed the back center seam first. I used a flat sewing stitch.
Next, I used a back stitch to sew the right and left fronts to the back at the shoulder seams starting at the outside edge leaving a neck opening.
- To attach the sleeves, find the midpoint and pin it to the shoulder seam and sew using the same flat stitch used for butting the back pieces together. Now you will have one continuous piece that looks like the Kimono Layout.
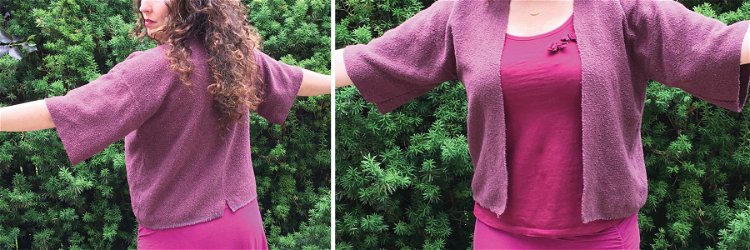
- Use the flat stitch again to sew the seam from the armpit to the bottom right and left. The last seam will be the backstitch from the armpit to the cuff of the sleeve. Now you will have a t-shirt looking cardigan. This technique for converting a pattern works best with square or rectangular pieces.
Notes
Although you can convert any knitting pattern to weaving, remember that woven fabric doesn’t stretch the same as a knit, and you may need to change the ease or even go up a size in the pattern. Right now I am not sure if it is faster than knitting, only time and the next installment will tell. Until then….
In Converting a Sweater Pattern Part 2, I will cover weaving and attaching the band along with embellishments.