Confident Spinning with Color: Project Decisions
By Deb Gerish
Skeins of yarn have a beauty all their own, yet in my humble opinion, they don't really come to life until they're used in a project. In addition, that final step helps us as yarn designers: we can evaluate how our color planning worked out and, if necessary, tweak some more as we work up the yarn.
The colors in my two cakes of Barry's Jubilee yarn came out differently because of my spinning choices. You'll recall that I didn't skein-sample because the colors were going to stay intact. But fabric sampling was vital: I wanted my soft, drapey yarn to create soft, drapey fabric that complemented the colors.
What You'll Need
-
skeins of handspun yarn
-
knitting needles
Directions
Out came the knitting needles, stitch markers, and gauge ruler. For each yarn, I made a stockinette swatch about 6 inches wide with size 6 (4 mm) and size 8 (5 mm) needles, separated by a row of reverse stockinette. The fabric made with size 6 needles were drapey and firm but not dense. I liked that fabric immediately but also tried out size 8 needles just to be sure.
My first choice was better: size 8 needles produced a fabric that was too floppy for a cowl, though it would have been perfect for a light wrap. I could have made similar samples in crochet or plain weave, varying hook size or sett to see the effects in the fabric.
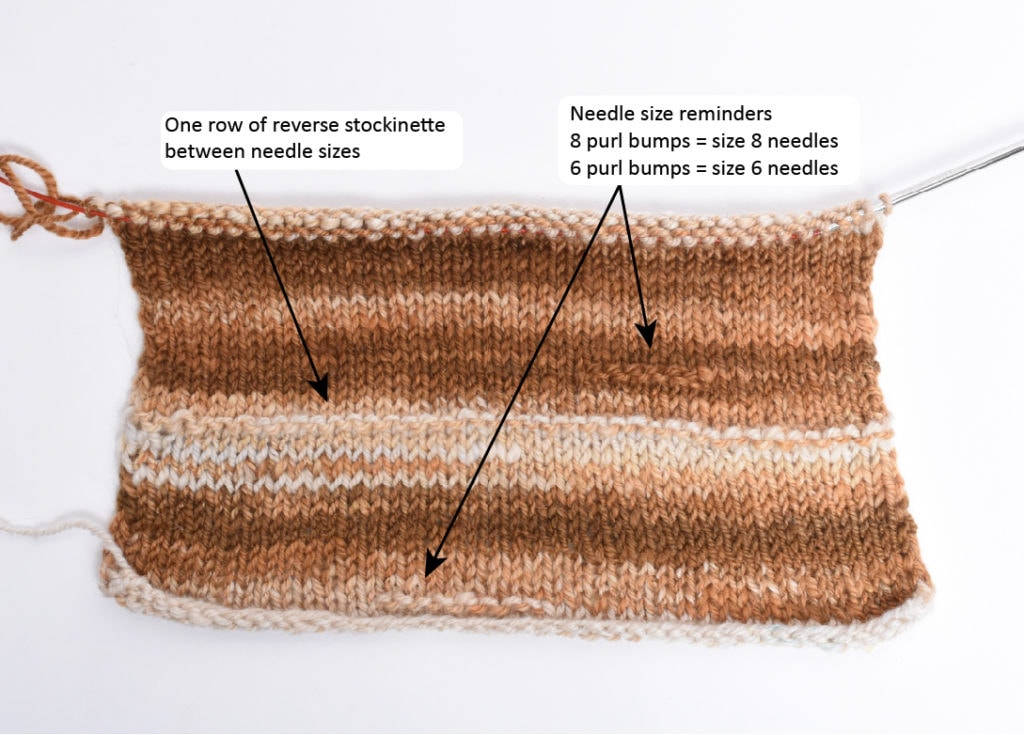
The swatches also revealed more color information. My gradient yarn (above) had pools of darker color and blips of white within the brown, which I'd expected from the way I created and sorted the color clumps. In other words, each band of color would feature tonal variations, adding depth and variation to the fabric.
Now compare my 2-ply swatch to Jillian's singles swatch. Transitions between colors are sharper in her fabric than in mine, because my colors didn't align perfectly. Whenever my yarn barber-poled, there are blips of contrast colors.
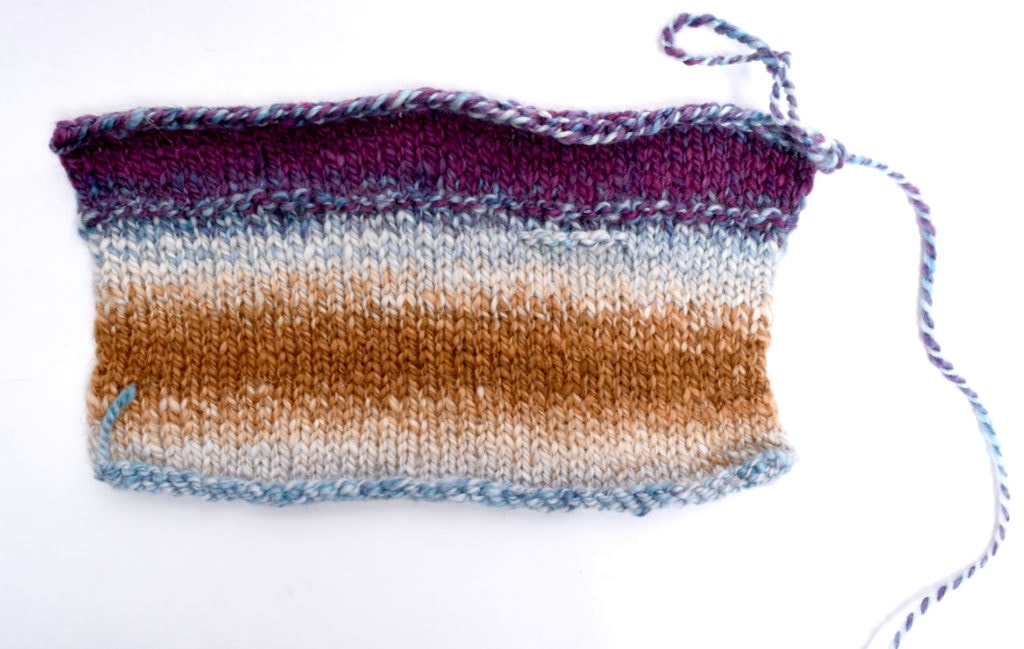
These four swatches illustrate a continuum of color interactions. If you want really distinct colors, make a singles yarn (Jillian's left swatch). If you want distinct colors with fuzzy transitions, make a plied in which colors mostly align but there's also some barber-poling (both my swatches). If you want a tweedy pointillist yarn, blend colors as Jillian described (her right swatch). Or go all the way and make rolags or batts from the braid—you'll get a heathered yarn that relies on optical mixing to create its final color.
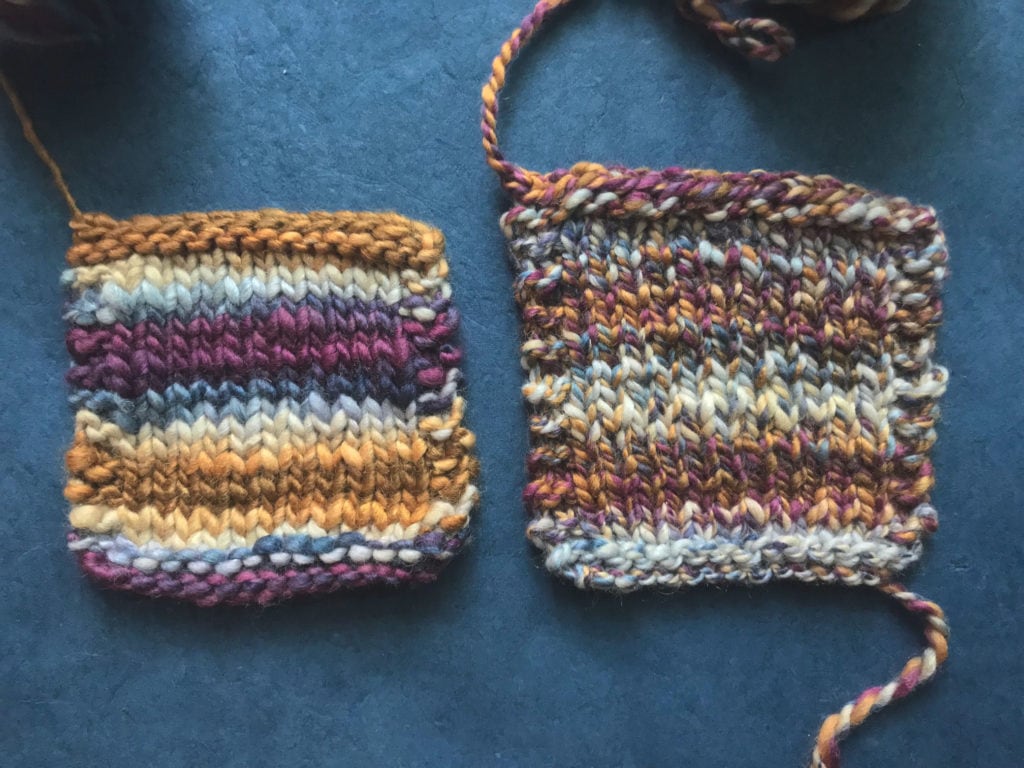
A final data point from my swatches: stitches and the textures they form also affect color interactions. Colors show up more in purl bumps than in the V of knit stitches because the bumps are bigger/longer. This holds true in crochet and weaving too. Contrasting colors will be less visible in smaller stitches or a closer sett and more visible in bigger stitches or a looser sett.
If you don't like to sample or swatch, I sympathize, because I used to be in that camp too. But now I love it, since this step lets me play with my handspun and learn about the fabric it can make. Think of sampling as time spent caressing your lovely yarn. Think of your sample as a low-risk canvas for trying stitch combinations, weave structures, and other design elements. Most of all, think of all the cool things you can learn about color from a single sample.
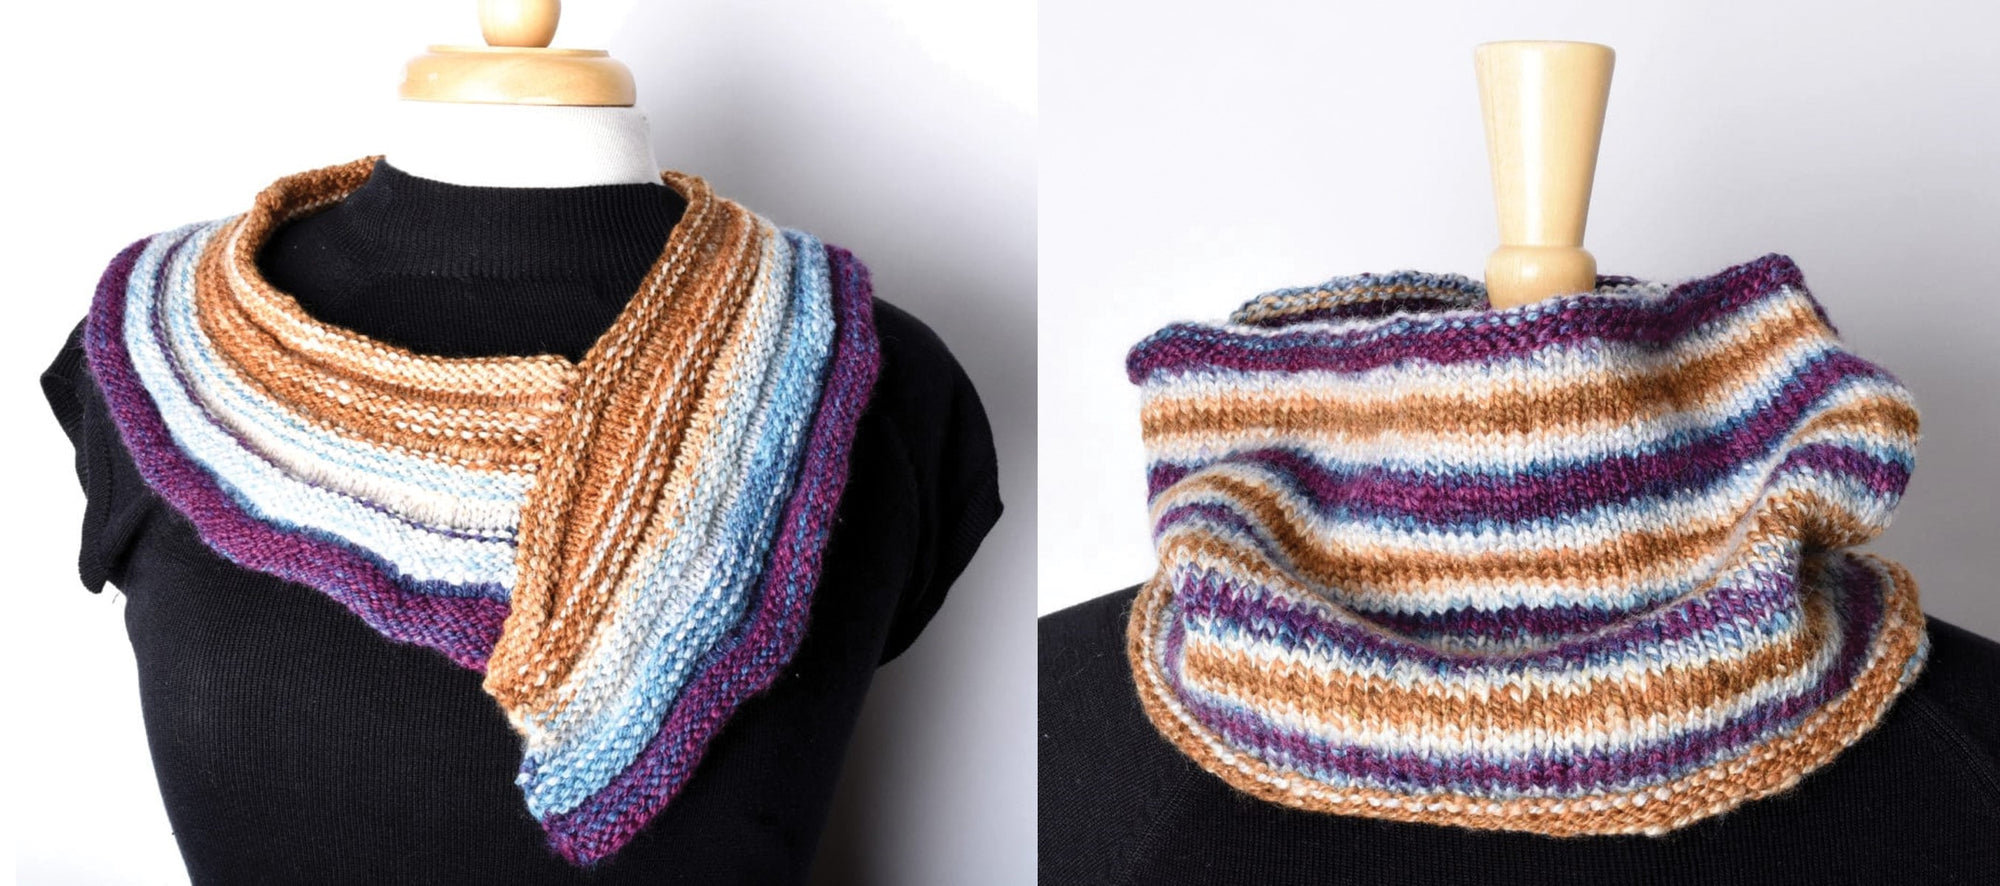
Barry's Jubilee Gradient Collar
Welts show off handspun yarn beautifully: the purl bumps look remarkably consistent even when the yarn's thickness varies, and colors have plenty of room to strut their stuff on the purl welts. I particularly like the single stripe of a contrasting color on several of the purl welts. This collar is knit flat and seamed; it's a long, skinny strip that curls in a slight crescent so that it will lie flat around the neck and shoulders. I'll wear it over a blue top to bring out the blues in the yarn. If I get really ambitious, I'll knit a blue V-neck sweater and sew this collar into it.
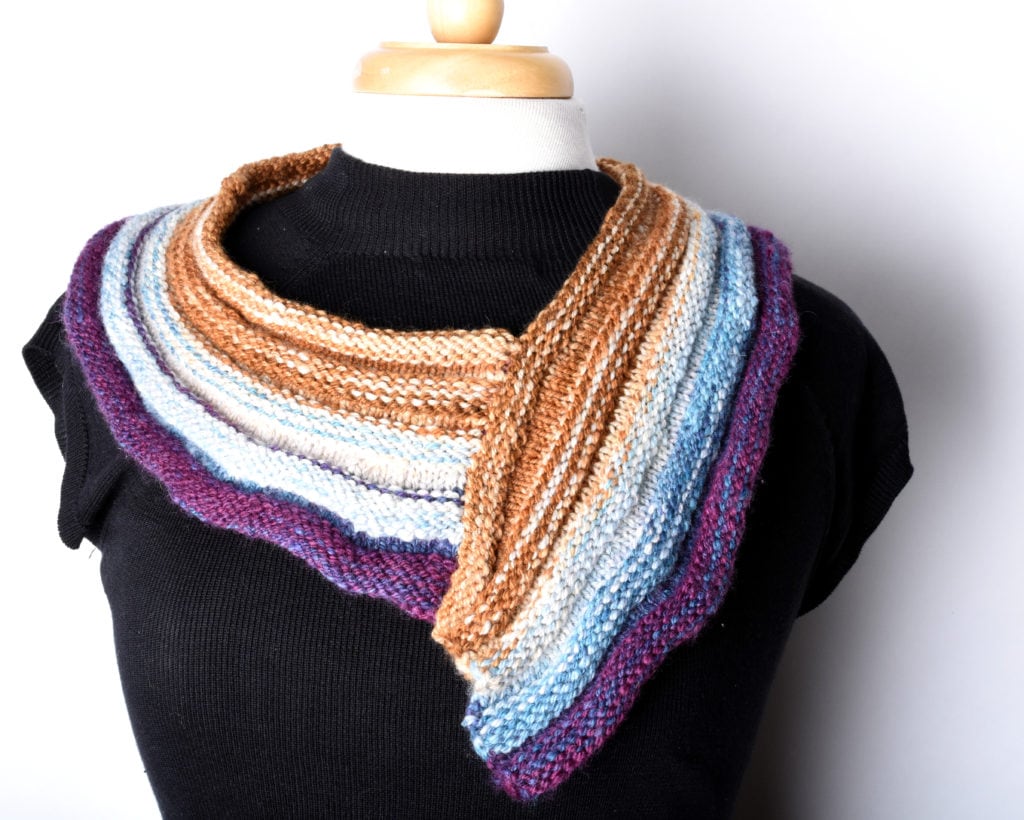
Spinning: Tear braid into clumps of similar colors, then arrange colors in a gradient. Spin a singles yarn, then chain-ply.
Yarn: Approximately 200 yards 3-ply sportweight (13 wpi), 900 ypp, from 4-ounce/100 g braid of Barry's Jubilee fiber (85% Polwarth, 15% tussah silk).
Gauge: 20 sts and 30 rows = 4" in stockinette stitch on size 6 (4.0 mm) needles.
Finished measurements: 4.5" high (unstretched), 26" long on inner edge, 42.5" long on outer edge after blocking but before sewing.
- CO 200 sts for outer edge.
- 1st purl welt: Work 5 rows in rev St st. Work decr row (WS): k8, [k2tog, k11] 14X, k2tog, k8—15 sts decreased, 185 sts.
- 1st knit welt: Work 5 rows in St st. Work decr row (RS): k8, [k2tog, k10] 14X, k2tog, k7—15 sts decreased, 170 sts.
- 2nd purl welt: Work 5 rows in rev St st. Work decr row (WS): k8, [k2tog, k9] 14X, k2tog, k7—15 sts decreased, 155 sts.
- 2nd knit welt: Work 5 rows in St st. Work decr row (RS): k8, [k2tog, k8] 14X, k2tog, k6—15 sts decreased, 140 sts.
- 3rd purl welt: Work 5 rows in rev St st. Work decr row (WS): k8, [k2tog, k7] 14X, k2tog, k5—15 sts decreased, 125 sts.
- Continue working knit and purl welts alternately, omitting the decr row and adding an additional row worked even. End with a purl welt (which doesn't have to be 6 rows high): Measure the row length and multiply by 3 to calculate the amount of yarn needed for each row. I had enough yarn for 5 purl welts and 6 knit welts.
- Weave in ends, leaving a CO tail long enough for seaming (height of knit strip x 3). Block very lightly: don't flatten welts and don't uncurl the first and last purl welts. Arrange the outer edge in a
- Seam one short end to the opposite inner edge as shown in the schematic, joining A to B. Work as follows: measure the height of the blocked cowl (A), unstretched. Use a removable marker to mark the inner edge at the same distance from its lower edge (B). Now seam with the CO tail, keeping the edge welts rolled and easing in the fullness of the other welts so they stay puffy where they meet the inner edge.
Barry's Jubilee Striped Cowl
I wanted to create a cowl that looked like I was wearing Felicia Lo's beautiful braid around my neck. A 2-ply self-striping yarn came close to replicating her dye pattern. My swatch indicated that colors repeated in multiples of 40 stitches (the width of the swatch); if the cowl was also a multiple of 40 stitches, things would work out right! This cowl is worked in the round, requiring no seaming.
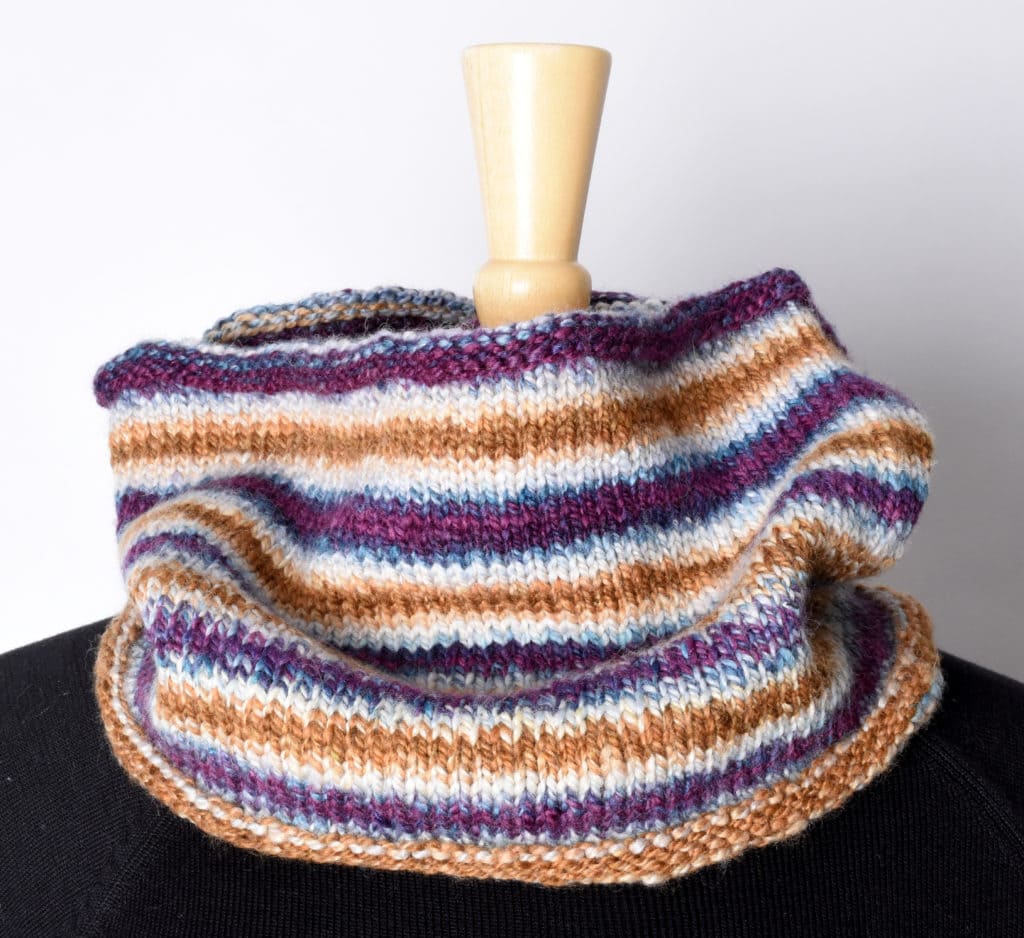
Spinning: Split the braid lengthwise into 2 sections. Spin each section from the same end of the braid, then make a 2-ply.
Yarn: Approximately 189 yards 2-ply DK/worsted weight (10–11 wpi), 750 ypp, from 4-ounce/100 g braid of Barry's Jubilee fiber (85% Polwarth, 15% tussah silk).
Gauge: 20 sts and 30 rows = 4" in stockinette stitch on size 6 (4.0 mm) needles.
Finished measurements: 8" tall x 25" circumference.
- CO 120 sts and join for working in the round.
- Work 4 rnds in rev St st for an edging welt about 3/4" high unrolled. (You could substitute seed stitch if you want a non-rolling edge.)
- Knit in St st until total height is about 3/4" less than your desired height, or until there's only enough yarn remaining for 5 rnds. Measure the cowl circumference and multiply by 3 to calculate the amount of yarn needed for each round (about 75" for this pattern).
- Work 4 rnds in rev St st for an edging welt. BO loosely.
- Weave in ends. Block lightly—don't unroll edging welt, but steam enough for the St st to lie flat.
- Wear proudly, remembering to tell people that you made the yarn!

