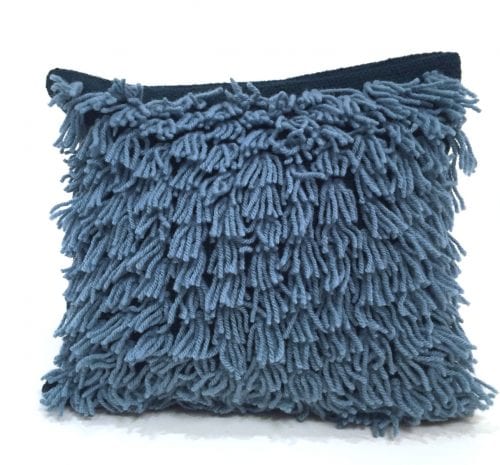
Pale Blue Fringed Pillow
Designed by Jane Patrick
Project Specs
Warp length: 56", which includes take-up and 18" loom waste
Width in reed: 15"
Total warp ends: 118
EPI: 8
PPI: 8. (1 skein is perfect for this project, if you beat more than 8 ppi or weave longer, you’ll need another skein of Dorado.)
What You'll Need
-
Warp yarn: Arbor from Brooklyn Tweed DK weight in Treehouse, 2 skeins, 145 yards per skein.
-
Weft yarn: Arbor from Brooklyn Tweed DK weight, 1 skein each of Dorado and Rainier, 145 yards, per skein.
-
15” Cricket Loom
-
15” stick shuttle
Materials
Equipment
Directions
Use Dorado for the plain weave. Use Rainier doubled for the ghiordes knots. Weave 1” of plain weave. Using the key, make a row of knots following pattern A, weave 4 rows of plain weave, and then make a row of knots following pattern B. Weave 4 rows of plain weave and repeat.
Tie the first row of ghiordes knots. It is important to begin at the correct place, as this first row of knots sets up the remainder of the rows.

Note: Alternate rows A and B checking to be sure that the rows of knots alternate and line up. Working right to left, work in this way: count over 9 warps and then tie two ghiordes knots (each ghiordes knot is tied over 2 warps, so 2 knots require 4 warp ends [XXXX] on the diagram), skip 12 warp threads and tie another set of knots, and so on.

Measure weaving off tension until the pattern is square. Weave the backing in plain weave for 20”.
Finishing: Remove the fabric from the loom and secure the ends. Wash by hand in hot water with mild agitation. If the fabric is not fulled sufficiently, place in hot dryer for a few minutes, watching carefully. Lay flat to dry and then steam press.
Assembly: Zigzag and straight stitch between all cutting lines. Cut three pieces: the front leaving a ½” seam allowance at either end, cut the two pieces for the back which includes a flap closing--1 piece 8” long and another piece 9” long.
Sew a 1” hem in the longest piece and then attach the hook side of a 2” piece of a hook side of Velcro (the Velcro will stick to the wool fabric) and sew this to the hem on the wrong side. Turn under 1/2" along the long edge of the other back piece and stitch.
Place the pillow front (fringe) side up (I used lengths of masking tape and temporarily taped the fringe to the inside to make sure it would not interfere with stitching). Place the back pillow piece with the Velcro facing up on top of the pillow front, and finally, overlap the short back flap piece on top of the Velcro piece. Sew around all sides. Press and turn right sides out.
Fill with your own pillow form or make your own with fiberfill and scrap fabric and insert in to your pillow. Enjoy!

