Spring Wall Hanging - 3-Dimensional Weaving
Designed by Benjamin Krudwig
Spring is just weeks away, and as the flowers are starting to pop out of the ground, we're sharing a project that pops off of the wall!
Heather, our sales and marketing director, approached me with an idea: use pom poms in a weaving and create a spring-inspired wall hanging. As is often the case, my mind started racing and I thought that we could make a series of wall hangings of little animals with pom poms as their body.
This idea evolved into a single wall hanging (for now) that uses a lot of texture to create a 3-dimensional piece using multiple elements such as ghiordes knots, pom poms, and Zoom Loom squares.
Project Specs
Weave structure: plain weave with ghiordes knots accents
Finished size: 4.5" x 14" including fringe
If you make your own 3-dimensional weaving on a Schacht loom, share it with us on Instagram using the hashtag #schachtspindle.

What You'll Need
-
Warp yarn: I used 8/4 cotton carpet warp enough for a 5" wide warp.
-
Other yarn: Grassy green yarn, a mix of textures and colors is best. I used odds and ends from my stash. White or grey yarn for the body of the bunny - I used a full skein (122 yards) of Classic Elite Liberty Wool in Ash Gray. Blue yarn for the sky - I used Classic Elite Liberty Wool in Pale Blue Disc.
Yellow yarn for an optional pom pom dandelion - I used Blue Sky Fibers Baby Alpaca in Dijon. -
Floral wire
-
dowel or stick for hanging - I used a faux pussywillow twig
-
Lilli Loom or other frame loom
-
pick-up stick
-
shed stick and 3-in-1 Magic Stick
-
Zoom Loom
Materials
Equipment
Directions
I warped my Lilli Loom about 5" wide. A skinnier warp creates a dynamic piece with great drama, perfect for a door hanging.
Weaving
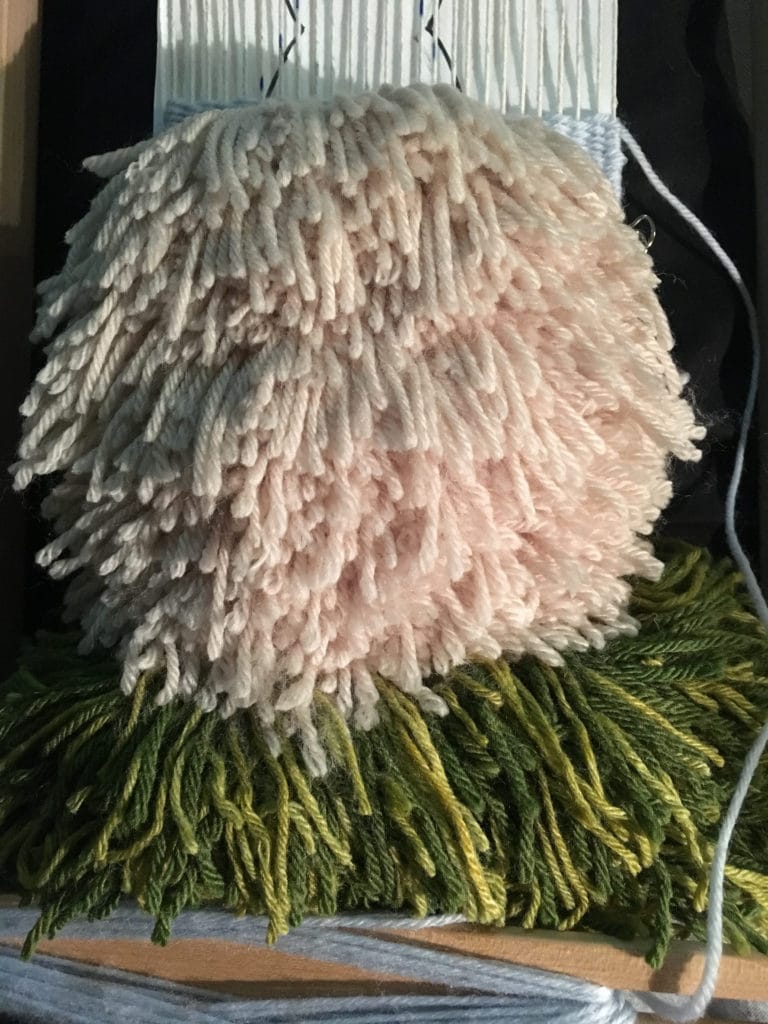
Weave the grass: I started by weaving a few rows of plain weave in green yarn, right up to the teeth. I then wove a row of green ghiordes knots using pieces of yarn about 4"/10cm long. Then I wove 4 more rows of plain weave. I repeated this pattern, alternating between ghiordes knots and plain weave for approximately 3"/ 7.5 cm, ending with a row of knots.
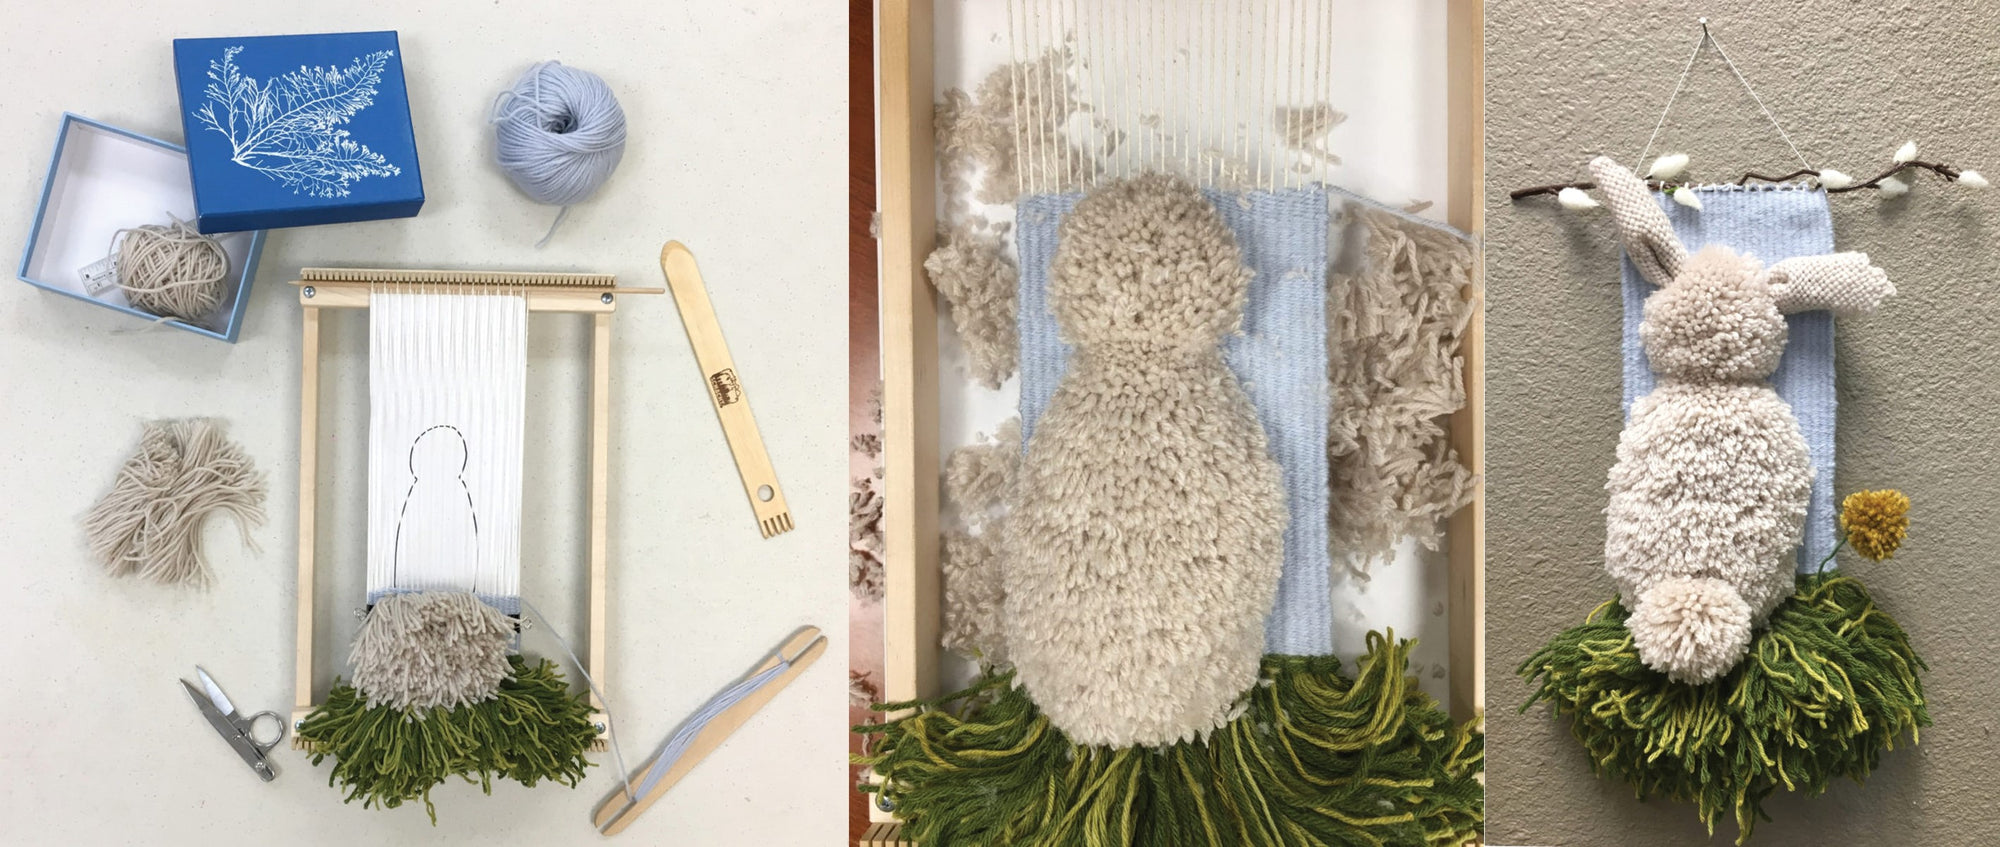
- For the body of the bunny I drew a cartoon or template that represented the shape of an upright bunny. I taped this to the back of my loom, and as I wove, I used binder clips along the sides to keep the cartoon from shifting.
- I wove 6 rows of blue, then start creating the body of the bunny with shorter ghiordes knots, about 2" long using 4" pieces of yarn. I repeated this process following the outline of my cartoon until the body/head of the rabbit was finished.
- Once the bunny was woven, I continued weaving with the blue yarn only until I was 3" from the top of the loom.

- With the same color yarn as the bunny, I wove two squares on the Zoom Loom and made a pom pom about 1.25" in diameter.
Trimming and Assembly
Before assembly, I trimmed the fringe on the rabbit, contouring around the body, neck, and head. I found it helpful to use the teeth of my 3-in-1 Magic Stick to comb through the fringe and trim any unruly pieces. I recommend trimming little bits at a time to prevent taking too much off.
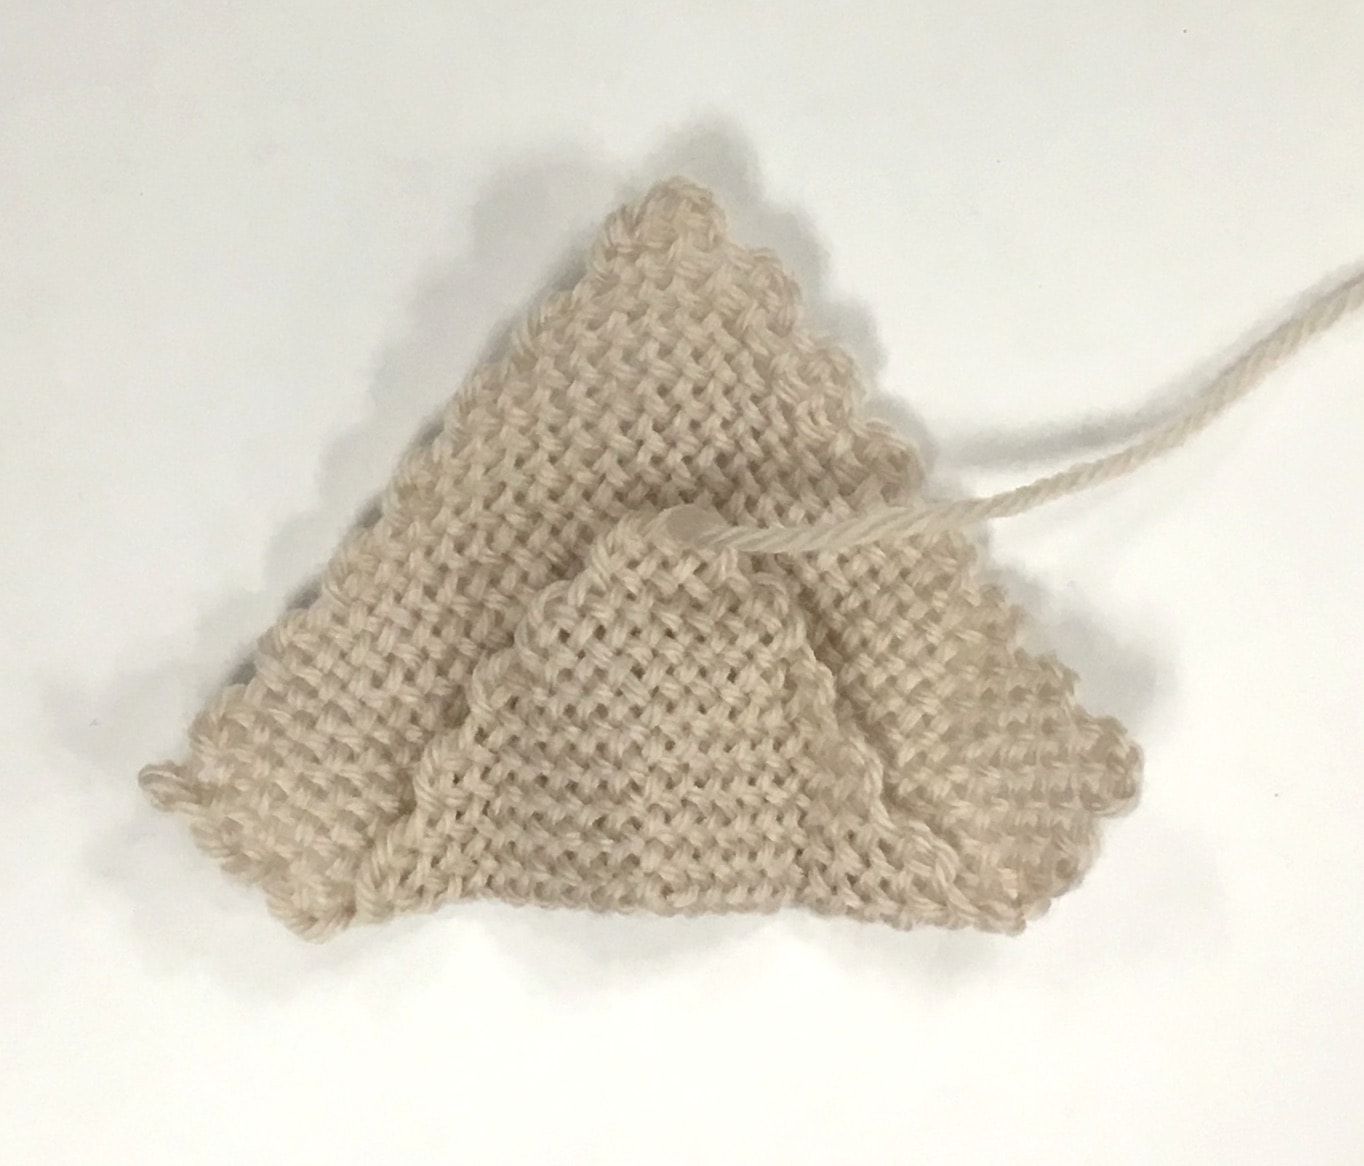
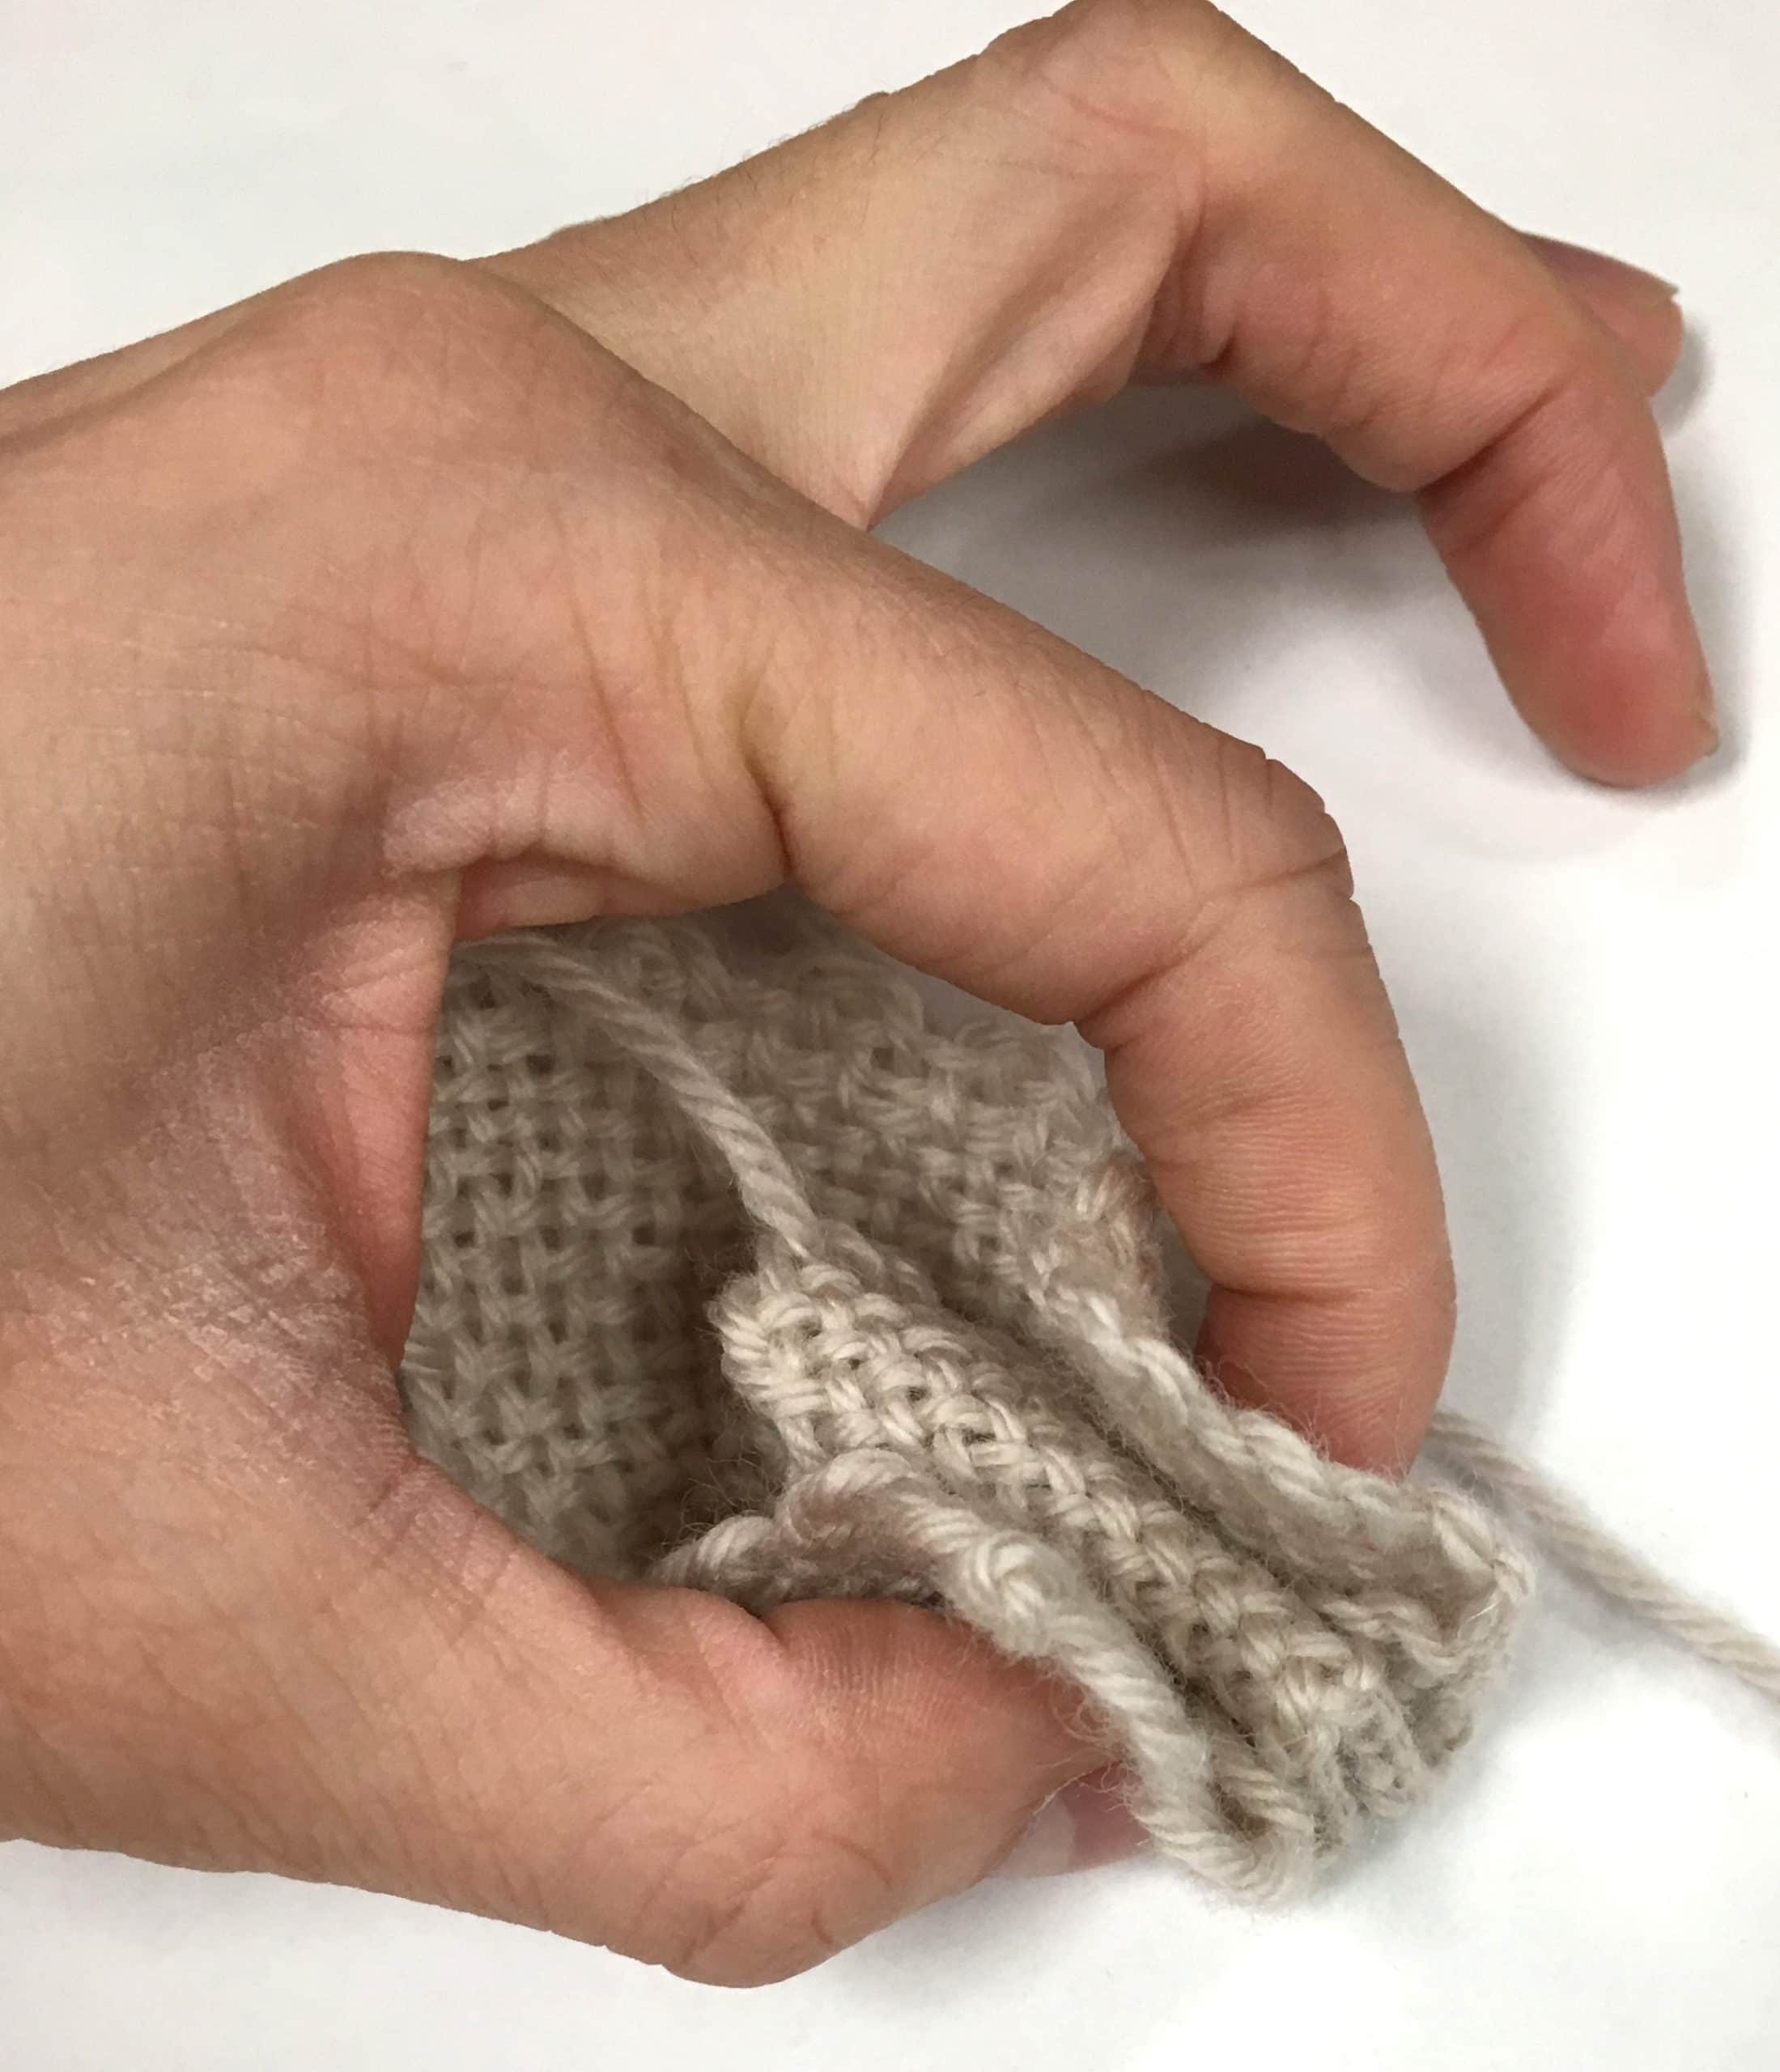
Make the ears from one Zoom Loom square each: Fold a corner up past the halfway mark as shown. Fold along the center diagonal in quarters.

Pinch and sew.

I sewed the pom pom onto the bottom of the bunny.
Optional: Make a small yellow pom pom, and attach it to piece of floral wire and insert that into the grassy area, positioning as you see fit. I loved this added pop of color to my finished piece.
Finishing
- I inserted the twig into the warp and started snipping the top of the warp threads and tying them to the stick. Once all of the fringes were secured, I sewed them into the back of the piece. I then used a small piece of cotton string as a hanger.
- A hot steam will help set and relax the fibers, but is not necessary for this piece.

