Weaving Adaptations for the Math Impaired
By Stephanie Flynn Sokolov
I love weaving. I love math. But somehow math feels like a barrier between my loom and me. When the book Simple Woven Garments by Jane Patrick and Sara Goldenberg was released, I was immediately drawn to the Green-Grey Topper. Since the colors of the original weren’t in my palette, I decided to change it up.
Making changes to a project design can be stressful to some weavers because finding a formula for changing yarns, the math and substitutions, can make the task seem daunting. It’s really not so difficult and I want to show you how I substituted yarns on this project with very little pain OR math.
Project Specs
Finished size: 27" wide x 18" deep (size medium)
Weave structure: plain weave with spaced wefts at irregular intervals
Warp length: 108"
Number of warp ends: 293
Width in reed: 19-1/2"
EPI: 15
PPI: 11
What You'll Need
-
Warp yarn: Scrumptious Lace from Fyberspates at 1000m/100g, 1 skein of 502 Gold.
-
Weft yarn: Berroco Andean Mist, 25g/150m, 3 skeins of 6319 Chaiten (peach).
-
48” of 1”-wide lace trim
Materials
Directions
Planning the Project
The original project calls for Alpaca with a Twist Fino for the warp and Trendsetter Kid Seta for the weft. When making a yarn substitution, my first step is to look at the yarn labels and compare what was used in the original project versus what I want to use.
While the book includes both yards/pound and meters/grams, I like to use meters per gram because I find the math easier to compute. In this case, a hank of the Fino is 800 m/100g. (You’ll find that almost all skeins, balls, hanks and other yarn put-ups are in 100g or 50g units. This makes comparing yarns easier than using 875yds/3.52oz (yikes!).)
My substitution warp yarn, Scrumptious Lace from Fyberspates is 1000m/100g. Both Fino and Scrumptious Lace are 100g skeins, though the Scrumptious Lace has more meters (1000 m vs 800 m), which means it is a finer yarn. Because the yarn is finer, this means that I’ll need a closer sett. Hmmm, the pattern calls for a sett of 12 ends per inch (EPI). I could either use two heddles for a sett of 16, or I could weave this on my Baby Wolf and sett it in a 15-dent reed. I decide to go with the 15-dent reed and thread the warp 19-1/2" wide.
I decided that I wanted to alter the pattern so that the stripes run vertically (I do not have the thin figure, so vertical stripes will be more flattering on me than horizontal ones). In the original, the stripes are threaded into the warp and then the fabric is turned during construction so that the selvedges run along the top and bottom edges of the top. I’m going to weave the stripes horizontally across the fabric, instead of creating the stripes in the warp. (When the piece is constructed, the stripes will run vertically.) This actually makes the warping super easy because I am not skipping any spaces—I will add the spaces in as I weave.
Once I have the yarn, sett, and warp width figured out, I review the warping instructions. The pattern tells me that if I am using a floor loom, I should add an additional 12” for loom waste to the length of my warp. Since I need to add 12” to 2-2/3 yards (the length of the original), that means I need a warp length of 3 yards or 36” x 3=108”. Yay, now I need to figure out how many threads I need to measure at 108”.
Ok, 15 ends per inch times the warp width of 19 1/2” is: 15 x 19.5” = 292.5”. Since I can’t have half of a thread, I rounded up to 293 warp ends, each 108” long. Multiplying these two numbers together will tell me how much yarn I need for warp: 293 ends x 108” = 31,644” of warp yarn. Divide the inches by 36 gives the total yarns needed for warp yarn. So, 31,644” divided by 36” equals 879 yards. The Scrumptious Lace is 1000 m (1093 yards), so one skein will be plenty for my warp yarn.
For weft, I used Berroco Andean Mist (25g/150m). I needed approximately 342 yards (312 m or 3 skeins), using only a small amount of the third skein.
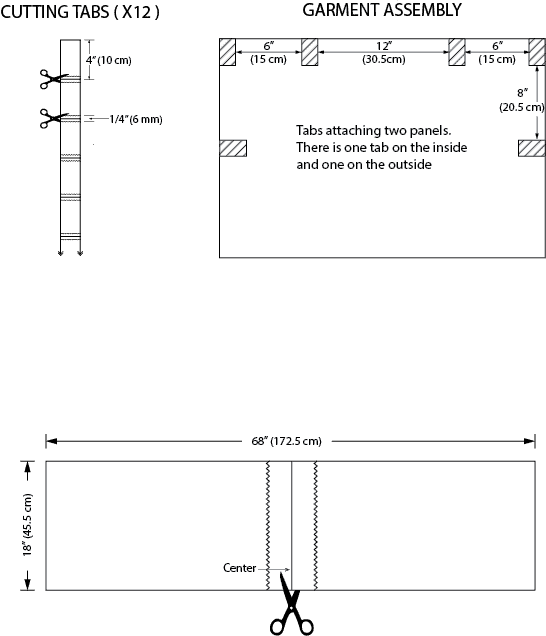
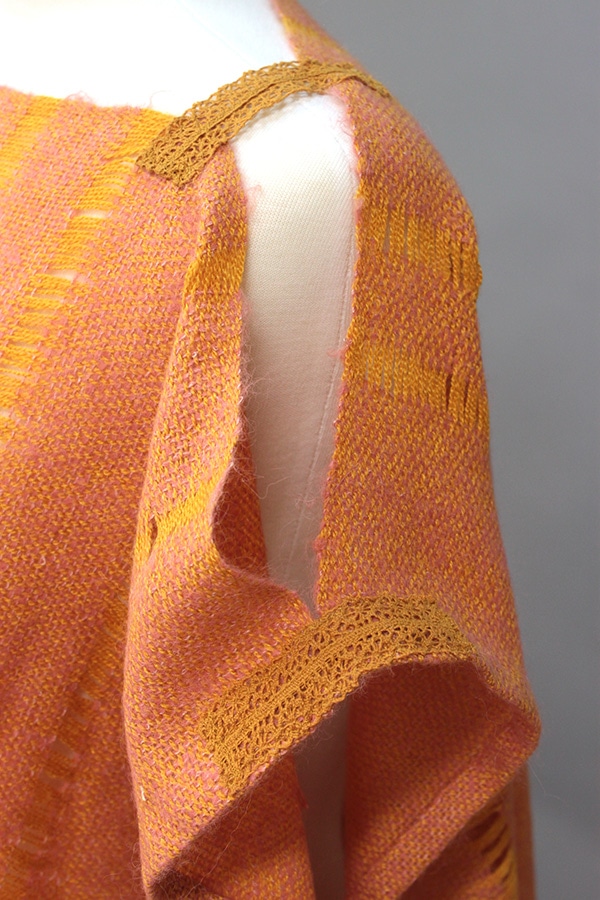
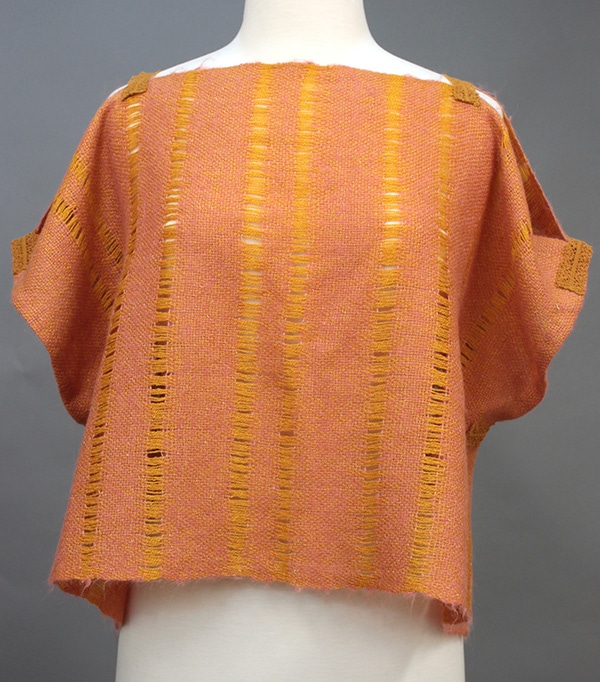
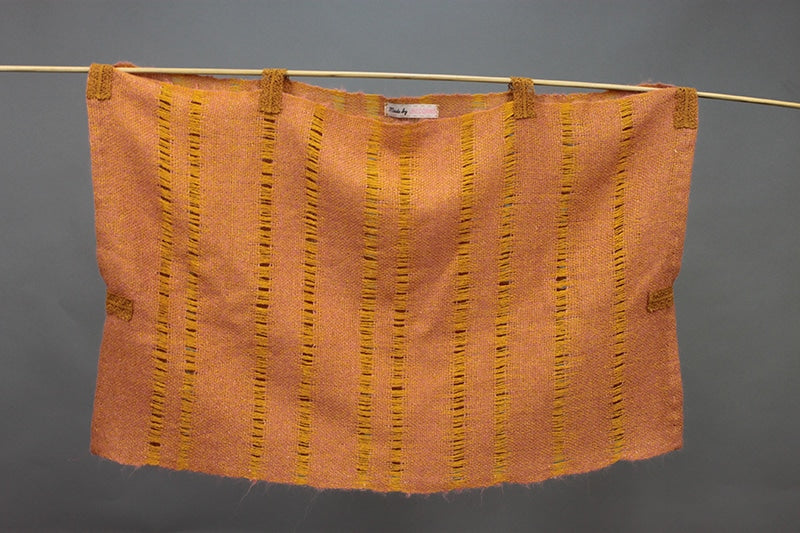
With all of the calculations complete, it is time to weave. Changing the pattern to vertical stripes instead of horizontal means that the spaces will be in the weft. A half-inch spacer placed in the weft will create spaces in a horizontal orientation. I wove this piece with random spacing at 11 PPI. Once the fabric was woven, I assembled the garment like described in the book, except instead of weaving the tabs, I substituted cotton lace edging. I butted and stitched the pieces together, folded over the ends and seamed to finish. I added the tabs to the woven fabric as shown below.
This beautiful pattern begged to be woven, and has well thought out instructions. My one wish was that I had increased the length and width of the woven fabric. I am fairly full chested and the woven piece would have been more becoming if I had increased the length (width of the warp) so that the garment had more drape over the bust. I think my modified pattern looks just as lovely as the original in the book.
Warping, Weaving, and Assembly
Warp the loom for plain weave with Scrumptious Lace.
Hemstitch at the beginning and end of each panel. Weave the first panel for 34”, inserting spaces randomly as described above. Weave a 1” spacer and then weave the second panel for 34”.
To finish the fabric, roll it up in a thin towel, tie the bundle with wool, and then place in a pillow case. Machine wash in hot water on regular cycle with mild soap. Check after 5 minutes and re-roll the bundle in the opposite direction. This will help the fabric full evenly. When the fabric seems sufficiently fulled, remove from the machine, rinse by hand, lay flat to dry, then lightly steam press.
For tabs, cut 12 pieces of the 1”-wide lace trim, each 4” long. Zigzag stitch on either side of the cutting lines.

Cut woven pieces apart, making two pieces. Hem the ends on both panels by stitching a ¼” double rolled hem by hand or with the sewing machine.
- Place the two hemmed panels one on top of the other, wrong sides together. Find the center along one of the long edges and mark. Measure out 6” on either side for a 12” neckhole.

- Connect the panels by sewing the tabs as illustrated. Note: there are two tabs at each point, one on the front and one the back. Fold under the raw edges before stitching into place.


