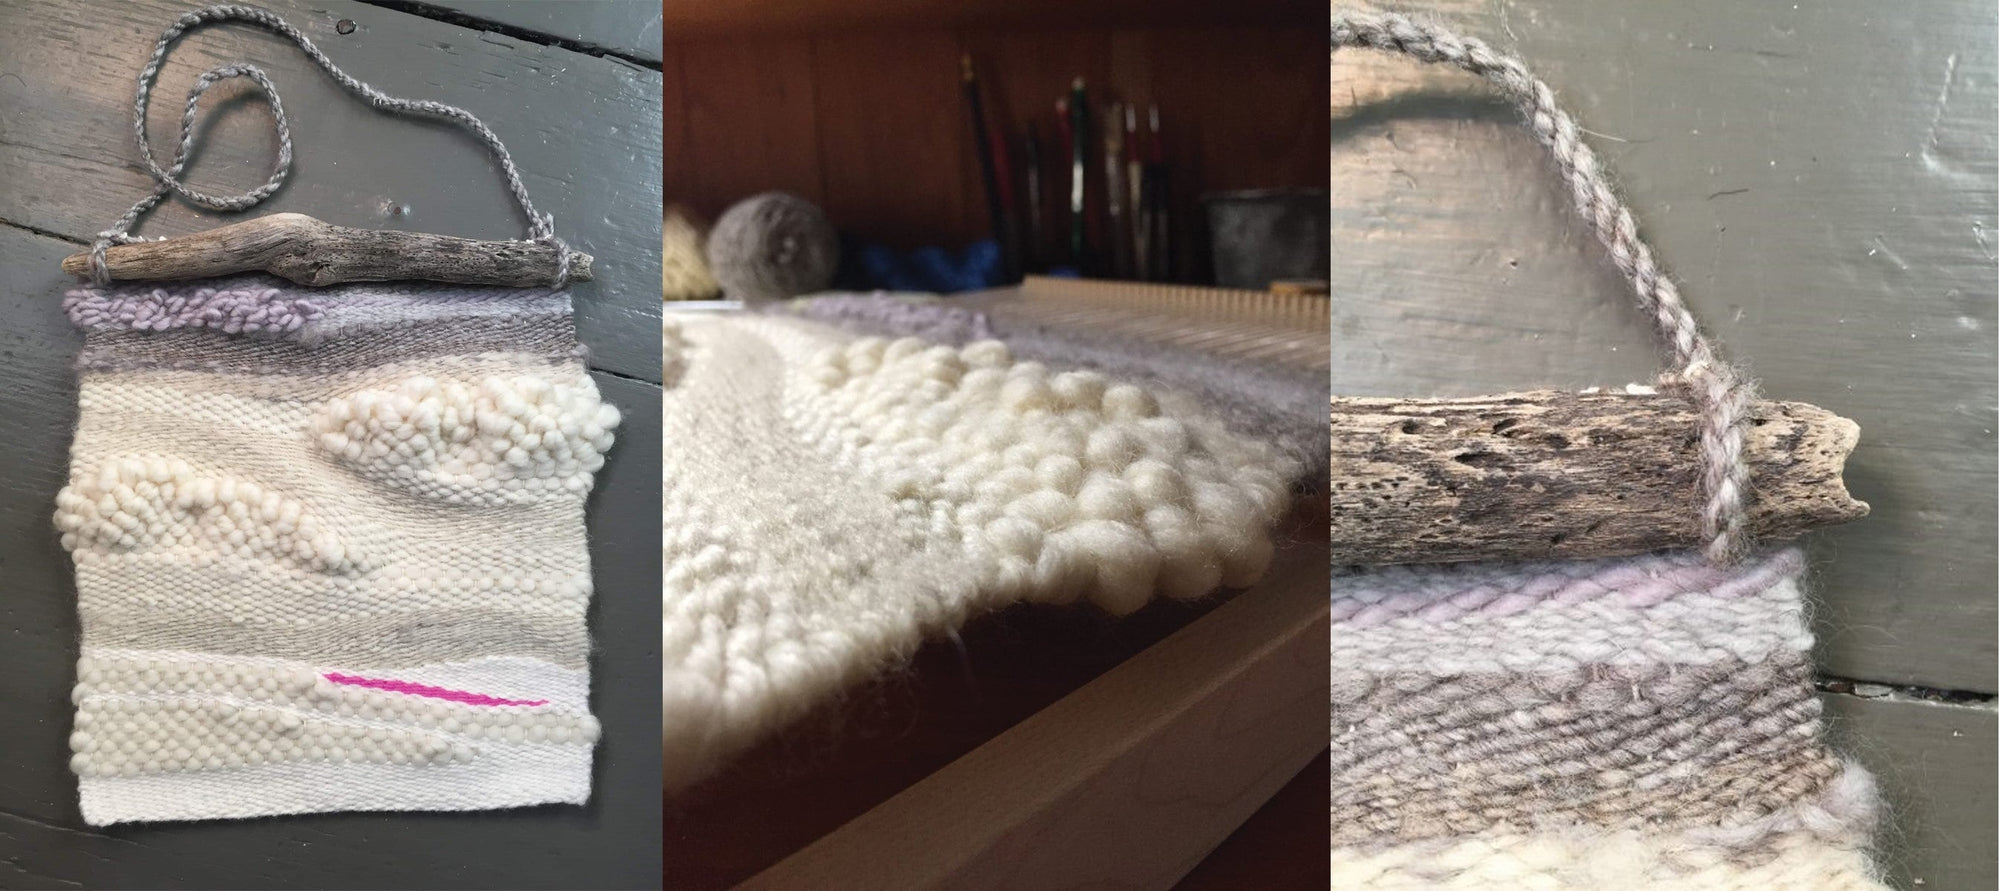
How Do You Hygge? Wall Hanging
By Melissa Ludden Hankens
Hygge. First of all, there seems to be a whole lot of confusion around how to properly pronounce this word of Norwegian and Danish origin, brought to media prominence by the Danes, and embraced of late by the western world. VisitDenmark indicates that the proper pronunciation is “hooga” and the word translates roughly to “coziness”. If you’d like to hear it for yourself, look no further than Meik Wiking, author of The Little Book of Hygge. In this post, I’m going to show you how to weave a little hygge into your life with Schacht’s new Lilli Loom.
When I think of cozy, my mind immediately goes to textiles. I think soft, fluffy yarns that both look and feel snuggly. The Lilli Loom, Schacht’s new little frame loom, also embodies coziness to me. It’s a little hug of a loom that just wants to hang out with you on the couch and catch your cinnamon bun crumbs. Measuring approximately 10” x 15”, it fits easily in your lap and loves a good road trip. It is also the perfect loom for creating a little wall hanging.
I live in an 18th century saltbox style house. In our living room, we have low ceilings, exposed beams, plaster walls painted a pale gray, and a lovely little woodstove. Very hygge. Despite the fact that we’ve lived in our house for almost eight years, many of the walls are still waiting for adornment. Our style of décor is very similar to the hygge philosophy embracing the following qualities: coziness, a neutral palette with a splash of color, textured soft materials, and simplicity. With these qualities in mind, I went to my yarn stash to see what I had on hand.
I assembled a pile of yarns that were in the cream and gray families. For my pop of color, a very bright and bold pink fit the bill. I made sure to select yarns that varied in thickness and texture. Some were commercial and some were handspun. I knew I wanted to create several areas within my piece that were voluminous, rising up from the surface of the hanging to create a topographical experience. A little bit of extra chunky yarn goes a long way, as would some roving. This project is an excellent way to use some of the bits and bobs that you may have left over from other projects. Finally, I found a lovely piece of driftwood to use at the top of the hanging. You could use pretty much anything—a small branch, a metal rod, a ruler, a pirn, or nothing if you prefer. Use your imagination, and then get ready to weave.
What You'll Need
-
yarns in various weights
-
Lilli Loom
-
crochet hook
-
The Incredible Rope Machine for hanging cord
-
stick shuttles for weaving the full width
Materials and Equipment
Directions
Warping: Warping the Lilli Loom is as straightforward as it gets. Schacht has a fabulous video tutorial you can view here. Determine where you want your warp to start and end. Secure your warp thread onto a tooth at one edge of your warp width at the top of your loom. From there you wind your warp from the top to the bottom of the loom and back, wrapping the thread around each tooth progressively across the loom until you reach the far edge of your warping width.
Secure the end of your warp to the last tooth you wrapped at the top of your loom. I used Bockens 12/6 Seine Twine, but any cotton carpet warp will do, and there are so many color options out there if you plan to let your warp show.
The distance between teeth, top to bottom, is 15”, so the amount of warp you need varies depending on how wide you decide to warp your project. I warped my loom the full width, which is just shy of 21 yards of warp material.
Weaving: To weave with the Lilli Loom, insert the shed stick at the top of the loom, over/under/over/under across the width of your warp. The shed stick is not removed until your weaving is complete. It creates enough space for you to quickly insert the pick-up stick every other pick to create a shed – a real time saver.
To weave your first pick, insert the pick-up stick at the top of the loom following the path of the shed stick, and rotate it onto its edge. This creates a shed (opening) for your shuttle to pass through. Remove the pick-up stick, and re-insert it under/over/under/over across the loom, raising and lowering opposite threads from your shed stick. Turn the pick-up stick on its side, and send your shuttle back through the shed to create your second pick. (Starting at about the 2:30 minute mark, the video that teaches you to warp the Lilli Loom also demonstrates how to weave.)
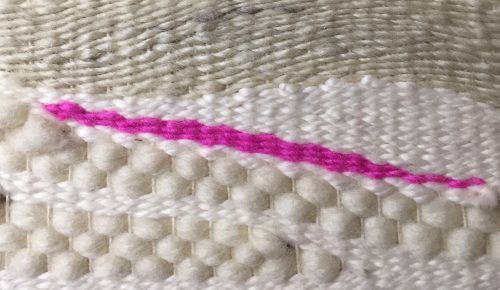
I started my wall hanging by weaving about an inch of commercial, worsted weight cotton yarn. From there, I began to build up an area using a very chunky yarn. I wove my yarn back and forth, gradually weaving the yarn across fewer warp threads to create a section that looks somewhat like a ramp. I went back to my original yarn and wove across the entire width of my warp to create both a textural and visual barrier between the chunky yarn and the next section of my weaving. Then I went back to the chunky yarn, this time weaving across the entire width of my loom for a few picks. Then back to the original worsted cotton for a couple of picks before weaving in a small section using bright pink yarn. I continued to weave with the worsted cotton across a smaller section of my warp to build the fabric up on the right hand side where the original ramp of chunky wool petered out.
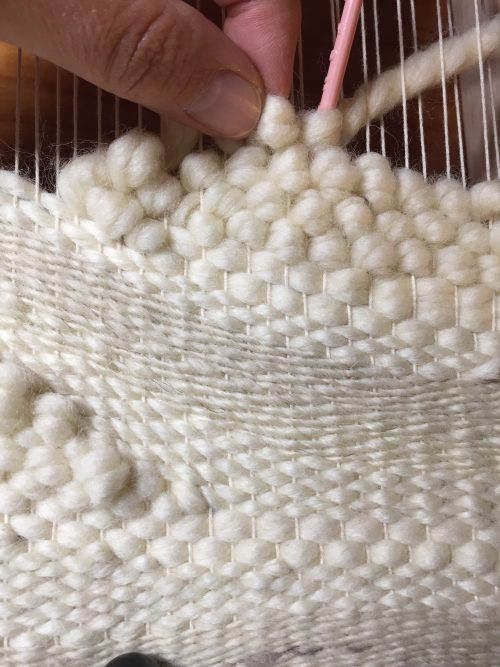
I continued along with this process of weaving until I was ready to add some volume. Using the chunkiest commercial wool I had on hand, I wove a pick about halfway across my warp. As I wove, I once again gradually reduced the number of warp threads I wove through to create a ramped area, but this time I changed how I was placing my yarn in each pick. Instead of just throwing a pick and letting the bulk of the yarn create the volume, I used a crochet hook to pull the weft yarn up between warp threads to create a little loop. The loops increased in size at the center of the cluster and were lower at the edges creating a hill-like effect.
From here, I created two additional yarn hills and eventually shifted away from the cream colored yarns to finish things up with gray. One thing I did to create variation throughout my weaving was use my tapestry beater to press some of my weft threads in either more or less firmly in areas to exaggerate a curve up or down. Eventually you’ll get to a point where it gets difficult to pass the shuttle. I was able to weave for about 11” before I called it quits resulting in a finished wall hanging measuring 10” wide x 11” long.
To finish your project, cut the warp threads at the top of your loom as close to the teeth as you can. I double knotted the cut ends in pairs, and using a yarn needle, wove them into the back of my hanging so they were not visible.
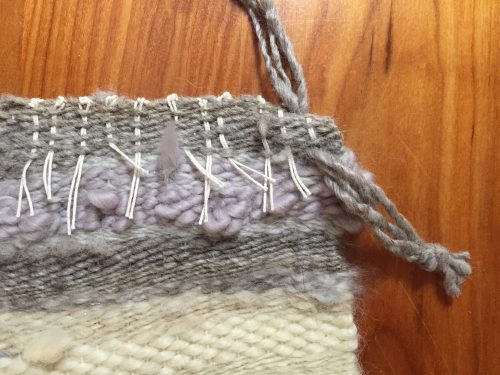
The project was then easy to lift off of the bottom teeth of the loom. I wanted this to be a finished edge, so using my yarn needle, I wove three picks of the original commercial cotton into the exposed loops to fill in the gap.
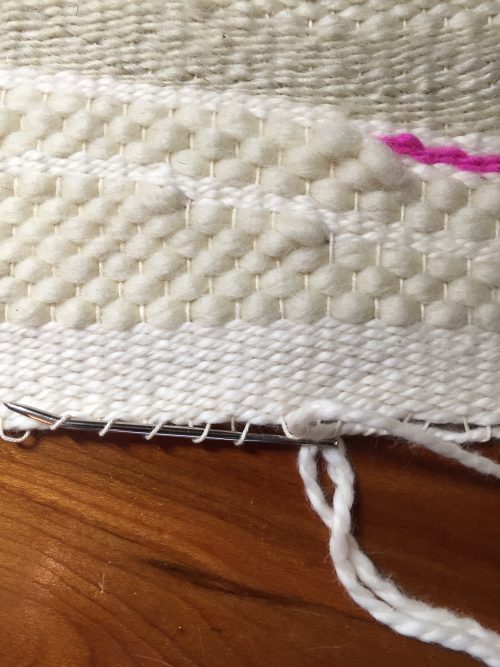
If you create a shorter hanging and start your picks a few inches up from the bottom edge of the warp, you also have the option to cut the threads and tie them off to secure. Feel free to add supplemental fringe to this area. Or what about a row of pom poms?
Once the wall hanging was off of my loom and the tails of warp and weft woven in, I needed to create a cord for hanging my piece. I cut four 25” lengths of gray yarn, knotted them together at one end, and created a twisted cord. Instead of knotting the second end, I fed it through a yarn needle. Coming up through the back of my wall hanging, about 1” down from the top edge, I threaded the cord through until the knotted end was secure against the back. I then threaded the cord back down through my weaving about two picks down from the top edge, pulling the cord back through, but leaving a small loop to secure my driftwood. I then brought the twisted cord up from back to front two picks down from the top edge of the hanging at the opposite side, and then down through, front to back about 1” down from the top edge leaving a small loop for the other end of my driftwood. From here, I removed the yarn needle and knotted the cord to secure.
If you make your cord longer than you need, you can re-knot it to shorten if need be. All that was left to do was insert the driftwood into the hanging loops, and my hygge wall hanging was complete.
Happy weaving!

