Zoom Loom Notebook Cover and Pencil Case
Designed by Deborah Bagley
Visit us at Yarnovations and our Etsy shop
It’s back-to-school time! Create a beautiful customized notebook cover and pencil case with Zoom Loom squares to amaze your friends or to send your student off in style! Make a “monogrammed” notebook cover with embroidery. Weave a matching or coordinating pencil case to make it a set. The ends of the pencil case are turned in the opposite direction giving it a fun three-dimensional construction. The pencil case is also the perfect size for holding all your yarn crafting supplies like small scissors, needles and crochet hooks. I like to weave my 5”, 6” and tapestry needles on the outside of the pencil case so I don’t lose them as I’m working!
Project Specs
Finished size: 9-1/2" x 3-3/4" x 3-3/4" for pencil case, 9-1/2" x 11-1/2" for notebook cover
Weave structure: plain weave
What You'll Need
-
Caron Simply Soft, medium weight. #9727 Black (35 yards), #9608 Blue Mint (9 yards)
-
10” zipper
-
fabric for lining (optional)
-
Caron Simply Soft, medium weight. #9727 Black (205 yards), #9604 Watermelon (26 yards); for the embroidery: #9608 Blue Mint (remnant), #9774 Neon Orange (remnant), #9777 Neon Green (remnant)
-
spiral-bound notebook, 8” x 10-½”
-
white gel pen and 3” alphabet stencil for embroidered letter
-
Zoom Loom and included needles
Materials for Pencil Case
Materials for Notebook Cover
Equipment
Directions
Pencil Case
In plain weave, make 5 squares: 1 Blue Mint, 4 Black.
- Double overcast or whip stitch 2 Black squares together to make a 1 x 2 rectangle. Repeat, for a total of two rectangles.
- Double overcast or whip stitch the Blue Mint square between the two Black rectangles on the wrong side to make a 1 x 5 rectangle.
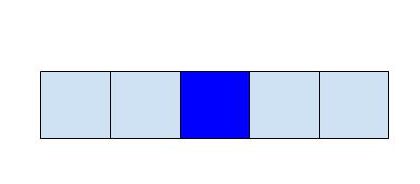
- Fold the rectangle in half in the middle of the Blue Mint square with the wrong side out. Sew one 10” side using Blue Mint on the Blue Mint section, and Black on the black section.
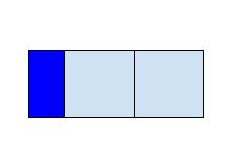
- With the wrong side still out, set the pencil case on the table with the seam sewn in step 3 flat on the table. On the black end of the case, fold each Black square in half to lay flat on the table. The Blue end should be vertical and the Black end should be horizontal. Double overcast or whip stitch the Black end closed.
If adding a lining, cut the lining and use needle and thread to sew in a lining and zipper. Note for adding a zipper, keep the zipper closed, pin, then sew to one side of the opening. Unzip the zipper, pin, then sew to the other side of the case.
Notebook Cover
In plain weave, make 27 squares: 24 Black, 3 Watermelon. Note: It is easier to embroider a square tension-wise when the square is still on the Zoom Loom, though the pins can get in the way when pulling the yarn. Decide whether you want to embroider the square on or off the loom.
- Double overcast or whip stitch 12 Black squares together to make a 3 x 4 rectangle. Make sure the embroidered square is the bottom square in the second column (when looking at it from the front.) Repeat (without the embroidery part) for a second black rectangle.
- If you have not already done so, embroider a letter on the bottom square in the second column. Use a gel pen to trace a stencil letter. Embroider with rose stitches, French knots, lazy Daisy, and straight stitches. See photo for placement ideas.
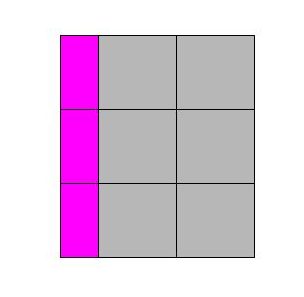
- Double overcast or whip stitch 3 Watermelon squares together to make a 3 x 1 rectangle.
- With the wrong sides facing, double overcast or whip stitch the Watermelon rectangle onto one side of one of the Black rectangles along the 12” side. Then sew the other Black rectangle on the other side of the Watermelon section.
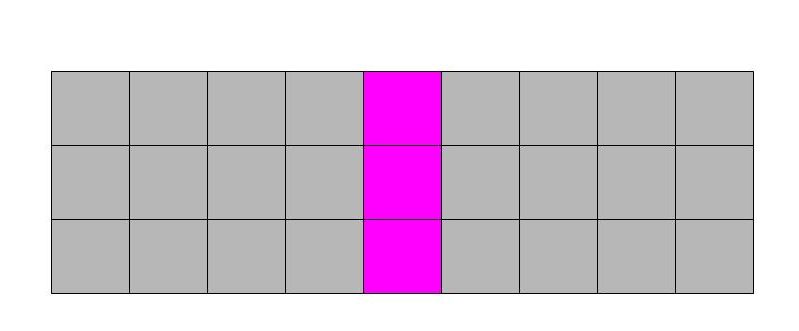
- With the right side facing, fold back 2 columns of black squares back onto the other 2 columns of Black squares on the same side of the Watermelon. Double overcast or whip stitch the top edge and bottom edge on the 8” sides. This will make a pocket for the notebook. Repeat on the other side of the Watermelon.
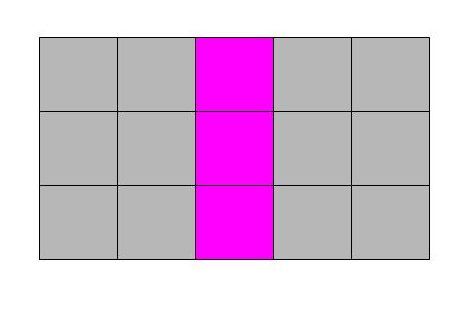
Turn pockets right side out and insert notebook.
You can also embroider a letter after the whole notebook cover is made. Insert paper or cardboard in the pocket to make sure you don’t embroider through both layers and accidentally close the pocket.

