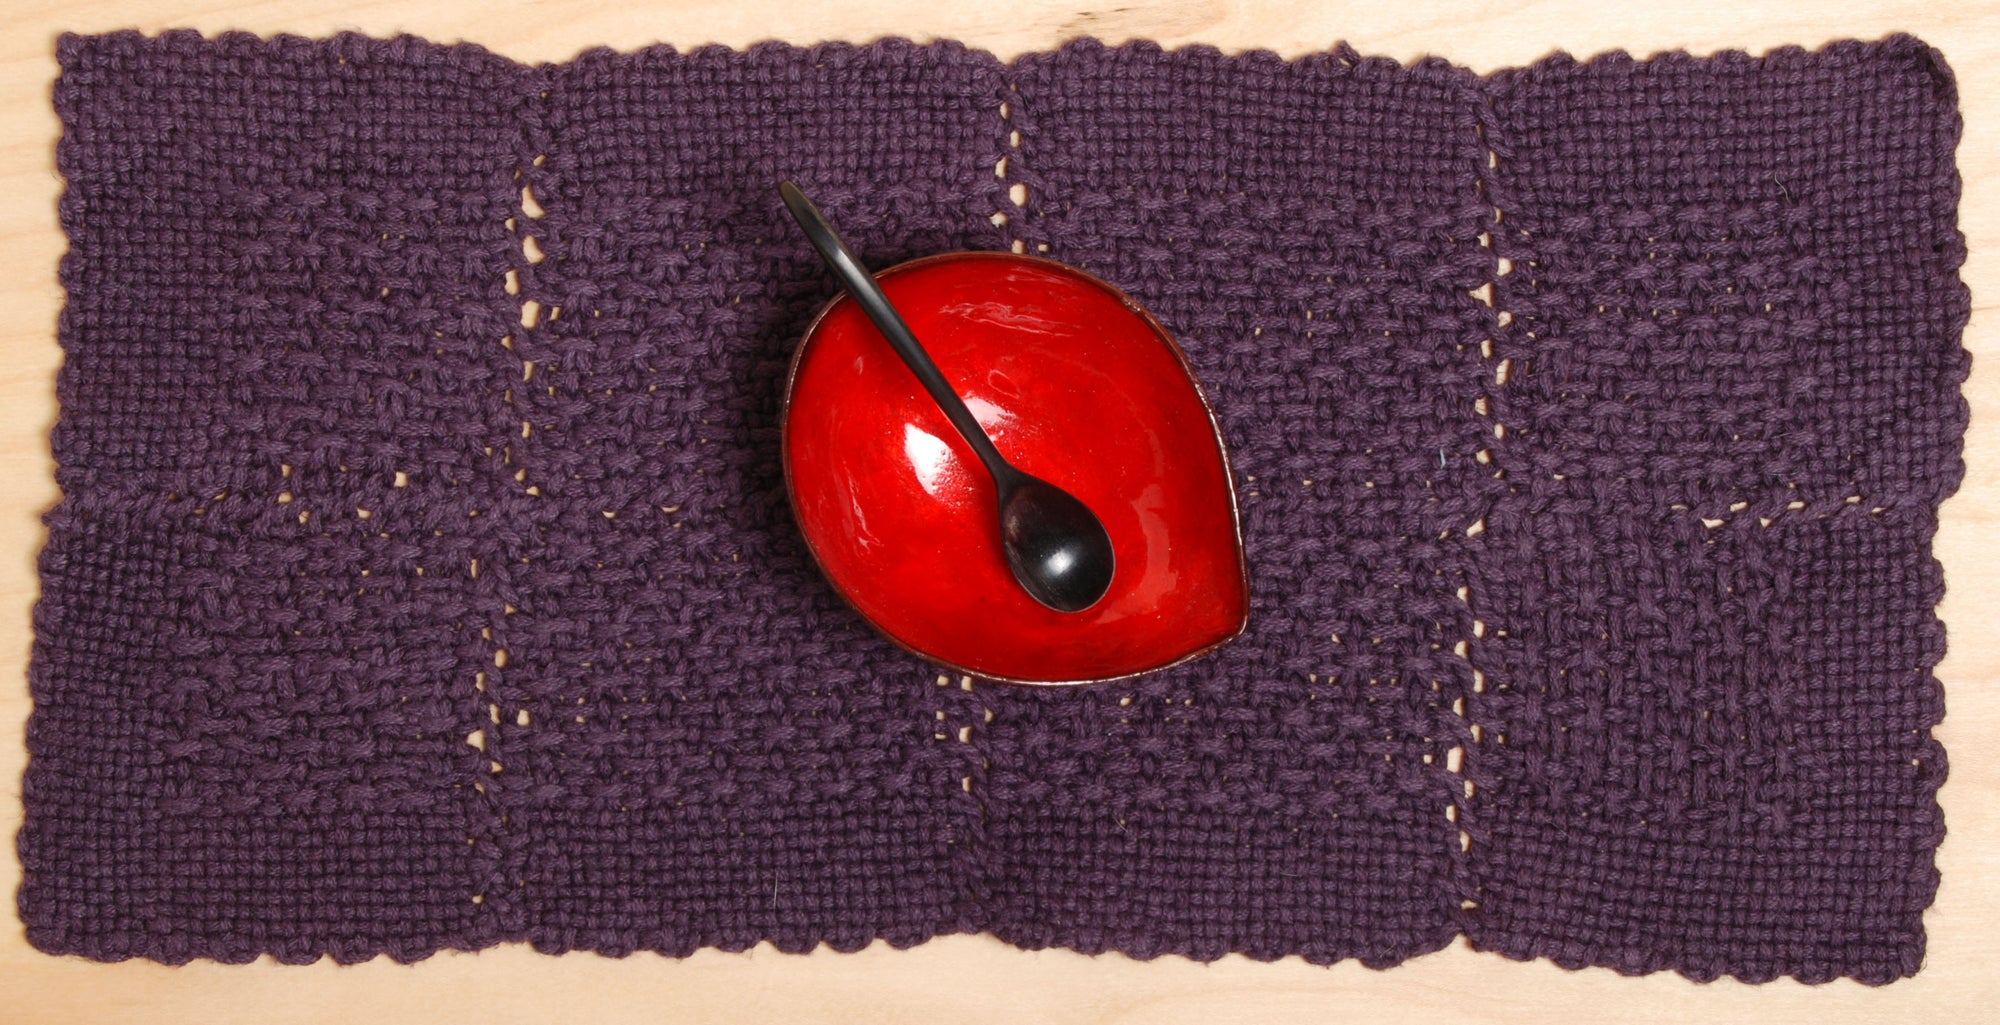
Zoom Loom Table Mat
By Melissa Ludden Hankens
When one has a three-year-old with a fondness for making tents around the house, tablecloths no longer serve their intended purpose. Our dinner table is scantily clad these days, choosing to cover itself with a small tray that holds various condiments and candlesticks. Well, I recently had one of those, “I’m a weaver with no table linens! How did this come to pass?!” moments. You know, the one where you realize that you’ve given away all of the dish towels you ever wove and you’re using (gasp!) a store-bought towel to dry your hands. Some of you may know what I’m talking about.
Enter the Zoom Loom. I found that I could easily weave up a square while watching Benjamin play, setting it aside to participate and picking it back up for a pick or two here and there. This could just be the perfect loom.
I wanted to create a rectangle with a central pattern and a plain weave border, two squares wide and four squares long. This involved weaving four corner pieces and two pairs of patterned pieces to use as connectors.
My first attempt was made using Rowan Creative Linen, a 50/50 blend of cotton and linen in DK weight. It looked promising while I was weaving it up, but I found that there wasn’t enough shifting and blooming of the yarn during the wet finishing process to blend the seams to my liking. I was left with a piece that has lovely drape, but looks more pieced together than I wanted.
From there I wove up four more sample squares, one each in the following yarns: Dream in Color Classy (variegated gray), Harrisville Highland (yellow—I like this, as it fulls up nicely without puckering), Peace Fleece (purple), Blue Sky Alpacas Organic Worsted Cotton (white), and a mystery worsted weight yarn from my stash.

I would suggest weaving a handful of samples using different materials. You will find something to do with them. With yarns being so varied your weaving experience with each material will vary as well. Also, you may find yourself addicted to this little loom, so be prepared.
Here I provide the pattern for the corner pieces as well as the connector pieces to create a 2 x 4 mat. I also wove up two additional 2 x 2 mats, one in the Peace Fleece and the other in the Blue Sky Alpacas Cotton. I loved how both looked during sampling, and plan to use the Peace Fleece mat as a trivet (yay wool!) and the cotton mat wherever the need may present itself.
Finished sizes: for a 2 x 2 square, 7 ½” x 7 ½”. For a 2 x 4 rectangle, 7 ½” x 15”
What You'll Need
-
yarn in DK or worsted weight, 8 yards per square
-
Zoom Loom
Directions
This pattern uses a simple combination of plain weave and an over three, under one pattern pick to create a plain weave border around a patterned center. The following abbreviations are used:
O = Over (a number of threads)
U = Under (a number of threads)
W = Weave plain weave (for a number of threads)
Include the loop at the beginning of your row as you count.
Corner Pieces (make 4)
1. Plain weave
2. Plain weave
3. Plain weave
4. Plain weave
5. Plain weave
6. W10, (O3, U1) x 5, W2
7. W2, (O3, U1) x 5, W10
Rows 8 – 15. Repeat rows 6 and 7
16. Plain weave
Connector Pieces (make in pairs—I wove four, but feel free to customize the length of your mat)
1. Plain weave
2. Plain weave
3. Plain weave
4. Plain weave
5. Plain weave
6. W2, (O3, U1) x 7, W2
Rows 7 – 15. Repeat row 6
16. Plain weave- Remember not to warp your loom too tightly. It will make weaving your last row tricky.
You could easily increase the width of your piece to three (or more) squares wide by weaving up additional pairs of connector pieces along with solid pieces to fill the center. For the solid pieces, simply weave the entire square in the pattern weave aside from the first and last rows, which should be plain weave.
- Weave your ends in. I like to do this while the squares are still on the loom.
You will find that the floats on two of the corner pieces reorient themselves from horizontal to vertical when you connect your squares. For this project, I alternated their placement so that the floats matched each other on diagonal opposites.
Sew your squares together using a whipstitch. I found it helpful to lay the pieces out on my cutting mat and stitch them together in place. This allowed me to match the pattern edges accurately.
Wash your piece in warm water with a bit of soap, press out any excess moisture in a towel, and lay flat to dry. Trim any ends. You may find that you want to press your pieces, especially those woven in cotton or linen.

