Bring fiber magic to your inbox. Subscribe to the Schacht monthly e-newsletter!
July 2018

Join the Community

We encourage you to join us on Instagram and Facebook to get updates and inspiration for all your weaving and spinning endeavors.

Tag your post with #schachtspindle

Upcoming Events

Estes Park Wool Market

June 8, 2023 Meet us in Estes Park!

New York State Sheep and Wool Festival (Rhinebeck)

October 19, 2023 Sheep and Wool Festival website

July 2018 Newsletter

Jillian’s Top Tips for Travel Spinning

Traveling with fiber arts is easy with the right tools and a good plan. I travel to teach a lot, so I take a wheel (my Sidekick) instead of a spindle. The Sidekick fits in tiny spots when I’m traveling by car and into a suitcase when I fly. I’m usually happily surprised with how much spinning and sampling I can get done while I travel. I have a few tips for traveling as a spinner:

I protect my sidekick when I fly

The best way to insure that the least amount of damage comes to your wheel is to carry it on. Since my teaching samples get carried on with me, I almost always have to check my Sidekick. I bought a hard-sided suitcase that is bigger than my wheel, so I can pad it with fiber, samples, and clothes.

When I pack my wheel, I make sure that the hooks on the flyer are turned inward so they don’t get bent. I only travel with plastic bobbins. I used to think it didn’t really matter until I had a wooden one break in transit. I pad my whorls with a little bubble wrap or fiber to keep them from cracking.

I always make sure I have the right tools I need

I built a spin kit in a 9ʺx6ʺ toiletry case. It’s stuffed full of all the tools that make my spinning easier—for a list, see my blog post “Everyday Spin Kit.” The kit doesn’t take up much space, and I know I will have every tool I want when I’m traveling. Of course, I have to remember to put all of my tools back in this bag and replenish my tags after I use them!


I usually have a sampling plan or two

I like to sample when I travel—it’s the perfect thing for smaller bits of time and I don’t have to maintain consistency over many bobbins of spinning.  I bring along one fiber I’ve been dying to try, and I know I will probably buy more wherever I go.

I used to bring only knitting needles for sampling, but a few months ago, I started packing a Zoom Loom along too. The Zoom Loom comes out when I’m not sure what I want to do, but I want to use the yarn right away. Weaving squares is relaxing and lets me compare how a particular yarn looks when woven as well as knitted. Plus each square takes only 8 yards of yarn. When I intend to use my Zoom Loom on a plane, I use a plastic needle and pack my long metal needle, to keep on the right side of TSA. (note: Jane Patrick had no trouble from TSA when she traveled with the needle in Europe. However, it’s up to each individual TSA agent to make that decision.) I just got a 6ʺ Easel Weaver, and that will be added to my travel kit next time. It’s great for sampling bigger or textured yarns, or weaving small freeform or tapestry pieces.

Since my Sidekick, spin kit, knitting needles, and 2 small looms take up less than half of my suitcase, I’ve got no reason to not happily spin, knit, and weave on the road.

Extending Your Warp

Dear Tabby,

I have a some luxury yarn that I want to weave with as little loom waste as possible.
HELP!

Exasperated Evelyn

Dear Evelyn,

There are ways to maximize your warp and waste as little precious yarn as you can, so have no fear.

Both of these techniques can be done on a rigid heddle loom or floor loom. The traditional way of tying on uses surgeon’s knots or bows around the apron bar. While knotting is a secure way to tie on to your apron bar, it can eat up 6 to 10ʺ of warp yarn.

You can save space at the front and back of your warp using two different methods.
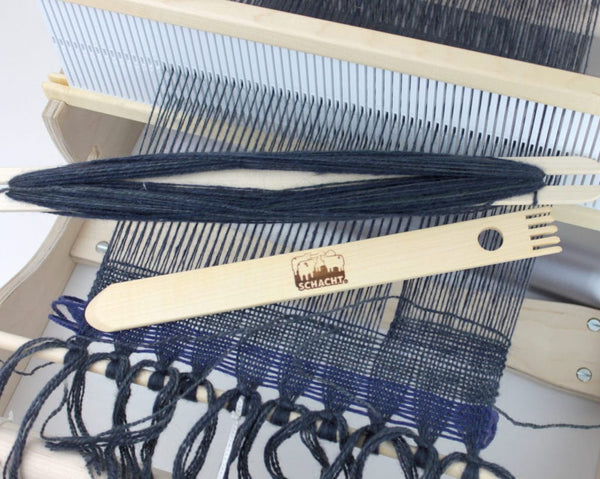
At the front: After threading your reed, tie groups or “bouts” of threads together with an overhand or lark’s head knot. I like to do this in 1/2ʺ to 1ʺ bundles in order to get more even weaving and fewer gaps at the beginning of my project. Then take a long cord (Texsolv cord works great) and tie one end around the apron bar. Thread it through the first bout of threads, wrap it around the apron bar, then thread through the next bout of threads. Repeat wrapping and threading across until you’ve gotten through all of the thread groups. To finish, tie the end of the cord to the apron bar.

Photo courtesy of Jeen on Ravelry


Once this is all set up, crank up the tension on your warp, then give your lashing-on cord a bit of a thwack with your hand, and the tension should even out across your warp. You can start weaving almost right up against the knots with minimal waste of warp or weft.

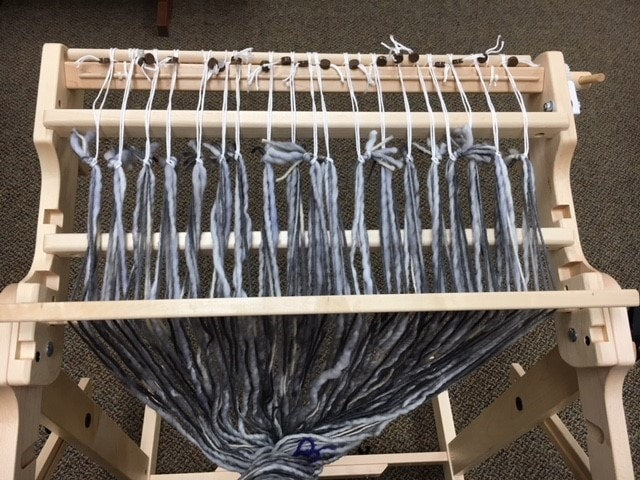
At the back, each bundle of threads is attached to the apron bar with a tie-up cord (normally found on a floor loom.) This requires attaching all of the tie-up cords to the apron bar first. I recommend putting the side with the “button” near the apron bar. Then attach each bundle to a tie-up cord with a larks head knot (This technique can be seen in our April e-Newes here.)

We hope these tips help you!

Happy Weaving!

—Tabby

Featured Products