Upping Your Game with Twill Coasters on the Zoom Loom
Designed and woven by Debbie Held
If you own a Zoom Loom, then you’re probably already bitten by the hand-held, pin loom weaving bug. It’s astonishing how much satisfaction can be gained from weaving a 4” x 4” square. However, there is almost always the inevitable question of what to do with all of the squares that so rapidly accrue. Sure, they can be seamed together to create a host of larger projects, but this type of finishing work can be too much for some crafters.
What if, instead, we were to up the ante on the front end by making the weaving itself far more exciting—providing a basic 2/2 twill (two warp threads cross every two weft threads, resulting in a diagonal line) pattern, combined with some easy finishing instructions so as to yield a set of eye-popping, hand-woven coasters? Why, then you’d have the makings of year-round gift-giving at its finest, and the time you spend weaving on your Zoom Loom will be not only engaging, but purposeful.
A few words about the following pattern: What are known as “novelty” weaving patterns for hand-held square looms date back as far as these pin looms themselves, the majority of which were first manufactured in and around the 1930-40s. This is my take on the popular diagonal weave pattern, or twill, to make it more user friendly.
- You will be weaving a total of 32 rows (with 31 warp threads in place), starting from the bottom right corner.
- EVEN-numbered rows are worked left–right; ODD rows are worked right–left.
- Each row will seem to be off by 1 (-1) after the pattern repeat is completed. This is how the diagonal is offset as you work across the loom.
- The initial setup of the first few rows may seem a bit daunting, but keep going. It gets easier. The same goes for the speed of weaving; each square can be woven in about 30 minutes, with the first one taking double that length of time. (Plain weave squares take only 15 minutes or so to complete.)
- In the following pattern, you will always be wrapping your working yarn around either the first or the third pins in each arrangement of pins. You will not wrap the middle pin in any of the groups; it is always skipped/omitted from the pattern. (When in doubt, check it out by looking at the growing edging along the sides of the loom.)
- At the end of each row, don’t be surprised if your needle tip tries to skew upward by one row. Gently remind it who’s boss. By remembering the above rule, you’ll know where you both should be in the pattern.
- Use the needle tip or your fingertips to push down your rows as worked.
- Make sure to check your work at the completion of each row. Use the needle tip to gently unweave your work if you notice that you’ve somehow gone off pattern, which should be immediately visible if broken.
What You'll Need
-
two contrasting yarns in DK–worsted weight; complementary or extra of one yarn for bottom layer square. (It takes about 8 yards to weave an entire square.)
-
iron-on fusing web (I used the kind that comes in a roll and costs just a few dollars)
-
Zoom Loom and accompanying needles
-
Optional: I used a digital row counter the first few times through the pattern, which made weaving the 32 rows much easier but you could use a pen/pencil and paper tally, or simply count the rows as you work.
Materials
Equipment
Directions
Warping in Two Vertical Offset Layers
Using either color yarn (in my examples, the warp is the black yarn) lay down the first layer, as per usual. That is, after catching the end in the lower-left slot, bring the yarn straight up and around the first two upper pins, then straight back down to the second and third pin in the set directly underneath. Continue alternating top and bottom levels in this manner, encircling the second two pins of each set, until you’ve worked your way across the loom. End with the yarn resting in the last space on the bottom row.
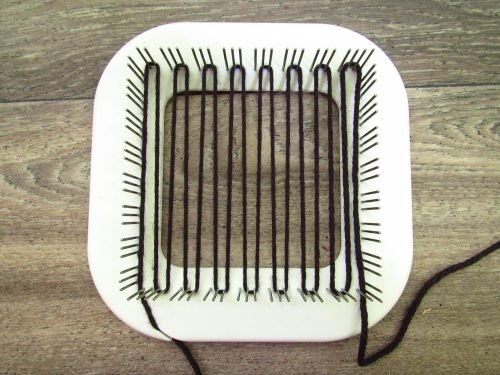
Wind the second vertical set of threads. Begin by winding the yarn back under that last pin on the bottom, then straight up and around the second two pins in the set directly above it. Continue wrapping your way across, again alternating top and bottom, and always wrapping the second and third (or last two) pins in each group. This time, end with the yarn resting between the top two left-most pins. Cut the yarn, leaving a 6-inch tail. Tape it to the back of the loom to secure it.
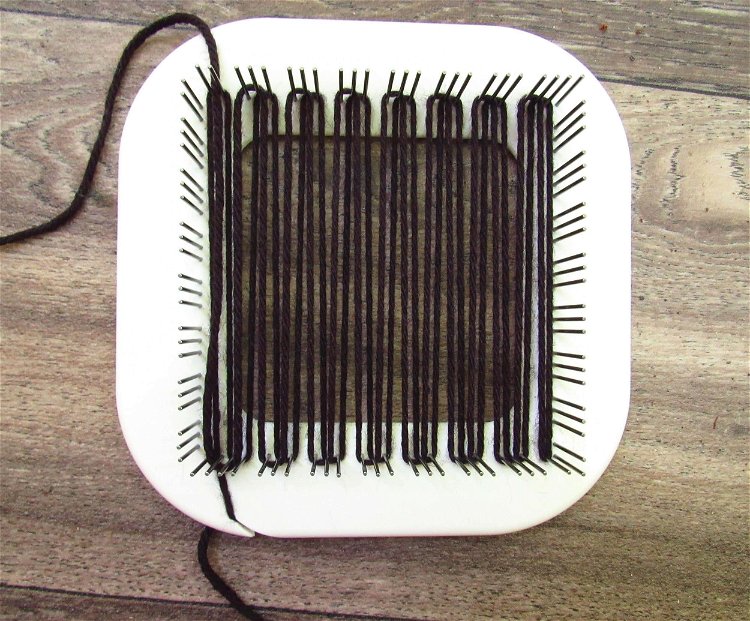
Take your second color and wrap that yarn around the loom nine times, then cut. This is your weaving yarn.
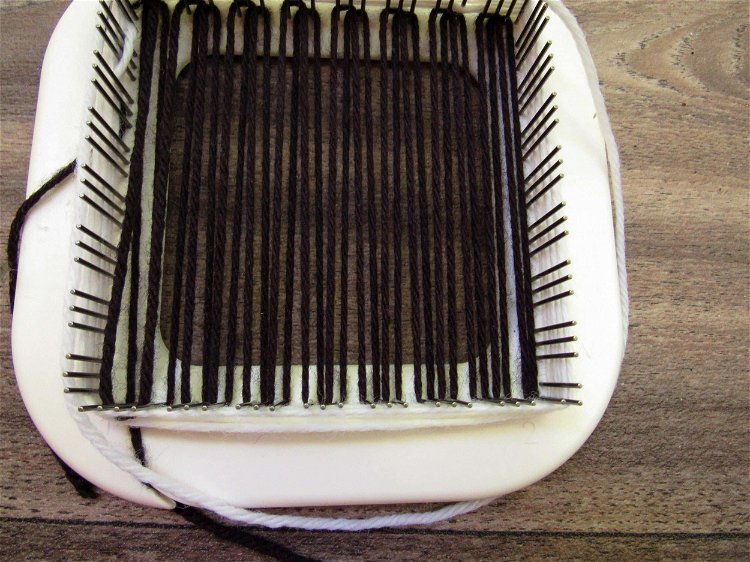
Now rotate the loom so that the numbers as well as the slot that grips the starting yarn are all upside down (the slot will be in the upper right corner). This is how we will be weaving the squares, starting in the lower right-hand corner.
Weaving
Take the cut ends of both yarns (the tail of your warp yarn and the beginning end of your weft yarn), wrap them both around the eye of the needle and press, so as to form two separate loops. Keeping the loops intact, push them off the end of the needle, then thread the needle by pressing the loops, together, through the eye.
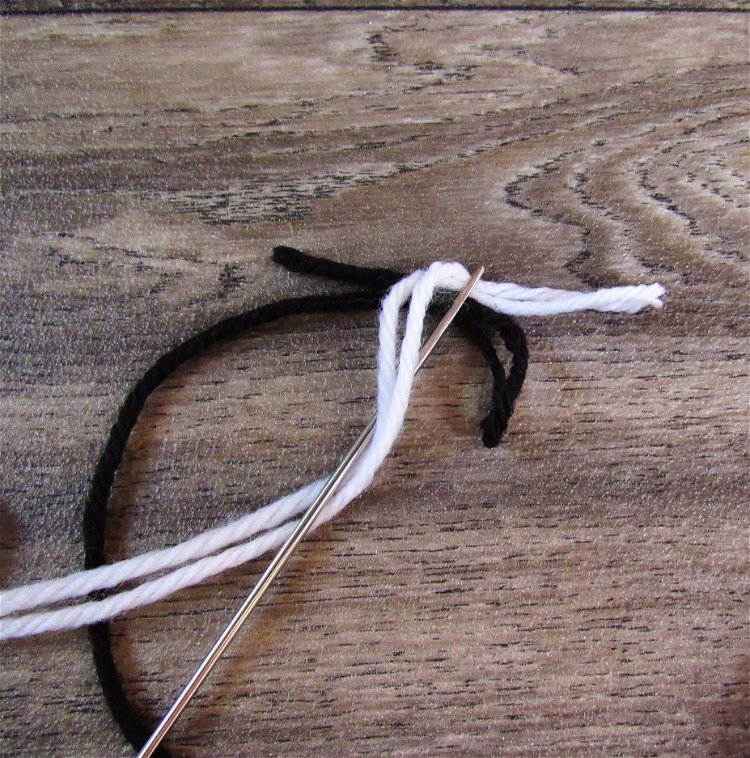
Weave rows 1 to 32 of the pattern, remembering that your loom is upside down from its norm.
Abbreviations: Pw=plain weave / U=work needle under warp thread / O=work needle over warp thread
Weave Rows 1–32
(U) Beginning in the corner gap where there is no pin, Pw across row, dropping your warp yarn (first color) after an inch or two (otherwise the setup rows will be too crowded). You will carefully snip its end later as part of your finishing work. Use your finger or the needle to guide the remaining yarn around the left bottom corner pin (not a side pin).
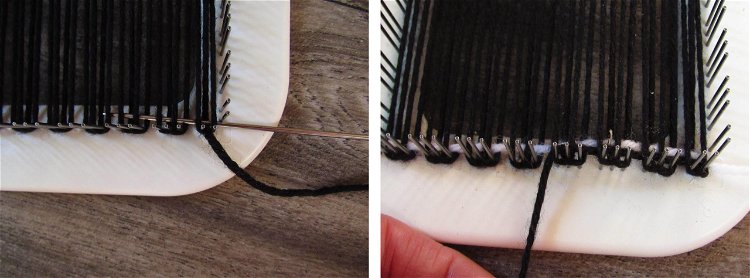
O2, U2 [repeat to end], -1(U), wrapping the first pin on the right side of the loom as you finish the row.
O2, U2 [repeat to end], -1(U)
O1, U1, [O2, U2 to end], -1(O) (Since there are only two pins here, a top and bottom and no middle, make sure to wrap this second one as you finish your row.)
U2, O2 [repeat to end], -1(O) (Note that you’re all set up now for wrapping the first and third pin of each group as you weave from here on out.)
U1, O1 [U2, O2 to end], -1(U)
O2, U2 [repeat to end], -1(U)
O1, U1 [O2, U2 to end], -1(O)
U2, O2 [repeat to end], -1(O)
U1, O1 [U2, O2 to end], -1 (U)
O2, U2 [repeat to end], -1(U)
O1, U1 [O2, U2 to end], -1(O)
U2, O2 [repeat to end], -1(O)
U1, O1 [U2, O2 to end], -1(U)
O2, U2 [repeat to end], -1 (U)
O1, U1 [O2, U2 to end], -1 (O)
U2, O2 [repeat to end], -1(O)
U1, O1 [U2, O2 to end], -1(U)
O2, U2 [repeat to end], -1(U)
O1, U1 [O2, U2 to end], -1(O)
U2, O2 [repeat to end], -1(O)
U1, O1 [U2, O2 to end], -1(U)
O2, U2 [repeat to end], -1(U)
O1, U1 [O2, U2 repeat to end], -1(O)
U2, O2 [repeat to end], -1(O)
U1, O1 [U2, O2 to end], -1(U)
O2, U2 [repeat to end], -1(U)
O1, U1 [O2, U2 to end], -1(O)
U2, O2 [repeat to end], -1(O)
U1, O1 [U2, O2 to end], -1(U)
O2, U2 [repeat to end], -1(U)
O1, U1 [O2, U2 to end], -1(O) (You can finish wrapping this final pin with your tapestry needle when weaving in ends, below.)
![Image of O1, U1 [O2, U2 to end], -1(O) (You can finish...](https://images.getrecipekit.com/20231115224246-proj-20upping-20game-20twill-20coasters-20final-20row.jpg?width=750)
Finishing
- Weave in ends prior to removing your cloth from the Zoom Loom, as tension is needed for best results. Carefully snip ends, including the one remaining in Row 1.
- Gently remove square from loom by rolling its edges toward the pins’ ends, then popping it off the loom itself.
- Block squares with a light mist of water or steam, then pin corners and edges to dry.
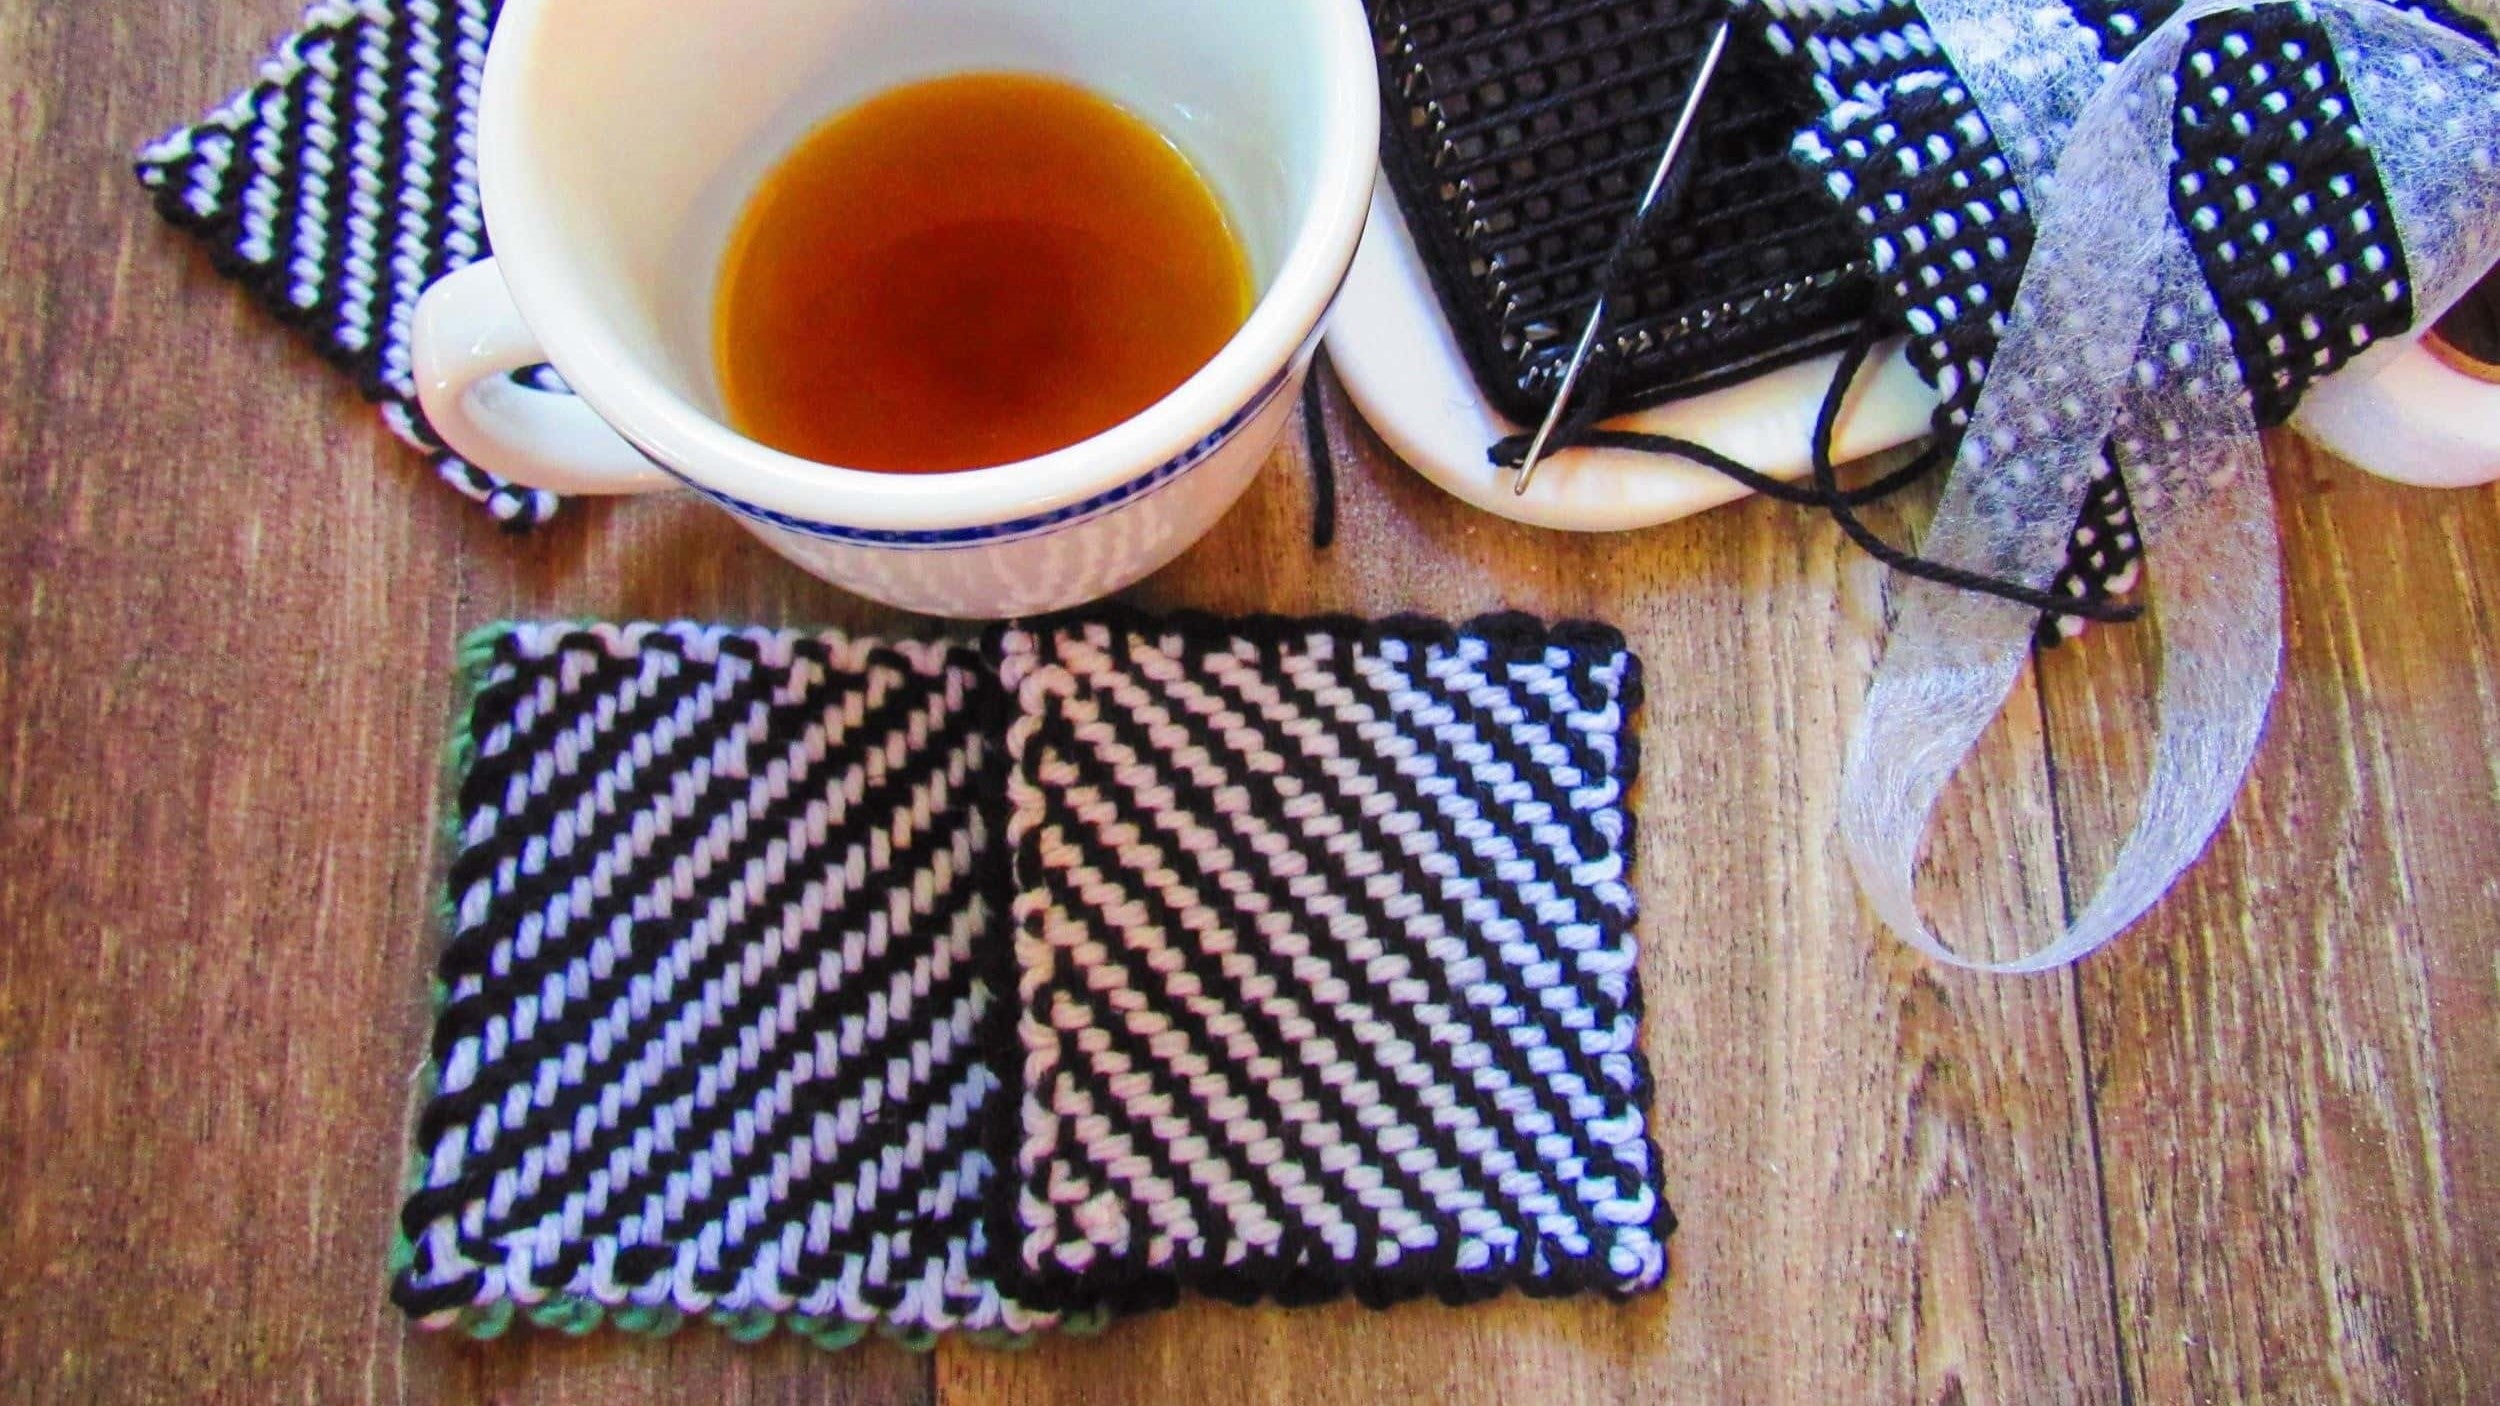
- Feel free to get creative with items around your household (perhaps some corkboard and a thick craft glue, for example), but our coasters are finished with a few yards of worsted weight yarn, in both black and a complementary color, woven into plain weave Zoom Loom squares. Each square is then heat set to one of the twill coasters using fusible strips, following manufacturer’s directions, then re-pinned until blocked dry. The scalloped edges on the plain squares frame the diagonal-stitch squares perfectly.
- You can experiment with different color combinations, including the multitude of hand-dyed offerings available today: solid with speckles, speckles with black or neutral, variegated and solid, handspun, etc. Just have fun and weave!

