Surprise Pick-up Pillow - Pillow Month
Designed by Judy Pagels
Our final installation of Pillow Month comes from Judy Pagels. You may know her as a vital member of our sales team and if you're a retailer, you've certainly spoken to her on the phone or at TNNA. Judy is known for her love of texture and color, and while she's an experienced weaver, her project had a little surprise in store for her! Judy's inspiration for her project was a recently completed bedroom remodel, for which she wanted to design some throw pillows.
Preparation: For the most part, I knew my basic color pallet, so I headed to the studio to peruse my stash. Initially I was hesitant to use my favorite options due to their luxurious fiber content. I tried to assemble other “reasonable” options but the single skeins of loveliness kept calling. Eventually I caved and embraced planning the project with fiber decadence the likes of yak, silk, alpaca, rayon, merino and cashmere. Yum! A total "treat yourself" moment.
Project Specs
Weave structure: plain weave with pick-up band
Finished size: 12" x 16"
Number of warp ends: 84 doubled warp ends, 12 bulky warp ends. Laceweight silk blend and sportweight alpaca rayon blend are used together as one.
Warp length: 2 yds—the yardage allows for three pillows.
Width in reed: 13-1/2"
EPI: 5 in bulky areas and 8 in the plain weave areas
PPI: about 8
What You'll Need
-
Warp yarn: 24 yds super bulky, 168 yds each of lace weight and sport weight yarns held together
-
Weft yarn: 120 yds of sport weight yarn
-
½ yd 27” wide fabric
-
12” x 16” pillow form
-
15” Cricket loom
-
15” variable dent reed
-
10” pick-up stick
-
11” slim boat shuttle and bobbins
-
sewing machine
Materials
Equipment
Directions
Prepare the variable dent reed in this order right to left: three 8-dent sections, two 5-dent sections, one 8-dent section.
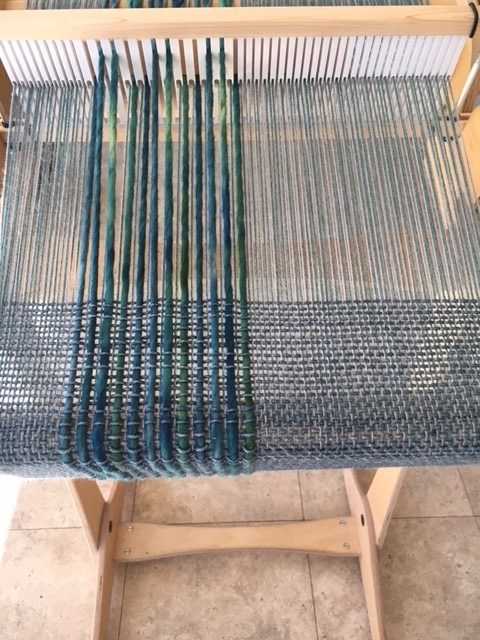
Working from left to right, thread 53 doubled warp yarns (laceweight silk blend and sportweight alpaca rayon blend are used together as one). Alternate 1 bulky in a slot and 1 doubled warp yarn in a hole 12 times, end with 19 doubled warp yarns.

For the weft I used a sport weight merino cashmere nylon blend.
To add some extra texture, I opted for a very simple pick-up pattern of just the bulky yarn. My goal was to have a balanced pattern that let me capture one of each color in the pairs of pick-up across this section of the warp. The pick-up pattern was: 1 down, 2 up, 2 down, 2 up, 2 down, 2 up, 1 down.
Weaving Sequence
4 picks of plain weave
Up and pick-up stick
1 pick of plain weave
Up and pick-up stick
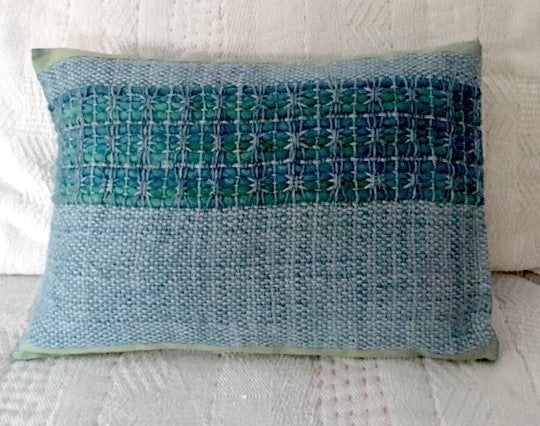
I wove as far as the warp allowed me and when I removed the fabric from the loom I was quite happy with the piece—especially the simple floats of the bulky yarn created with the basic pick-up pattern. I was correcting some weaving errors when I flipped the fabric over, and then let out a yelp at what I saw. The floats I was so pleased with on the front had been creating a much more interesting graphic pattern on the back. I was absolutely over the moon!!
The finished fabric yardage allowed for three pillow fronts. Prior to assembly I machine stitched each end of the woven fabric and hand washed it in warm water. I dried the fabric flat and lightly steam pressed.
Assembly
- I wanted to add a fabric border at the top and bottom front and back of the pillow, and in keeping with decadent inspired materials, a vintage silk fabric from Japan was just the choice. With cobalt warp and light green weft, the two create a fabric with a magical iridescent sheen that just makes me sigh. This and other similar fabrics have been in the family, sighed over and largely untouched, for over 50 years. Although I had the yarn for a short time, I had assigned it the same reverence as the fabric. Something to be preserved and only used for an indisputable, worthy application. Honestly, what am I waiting for?!
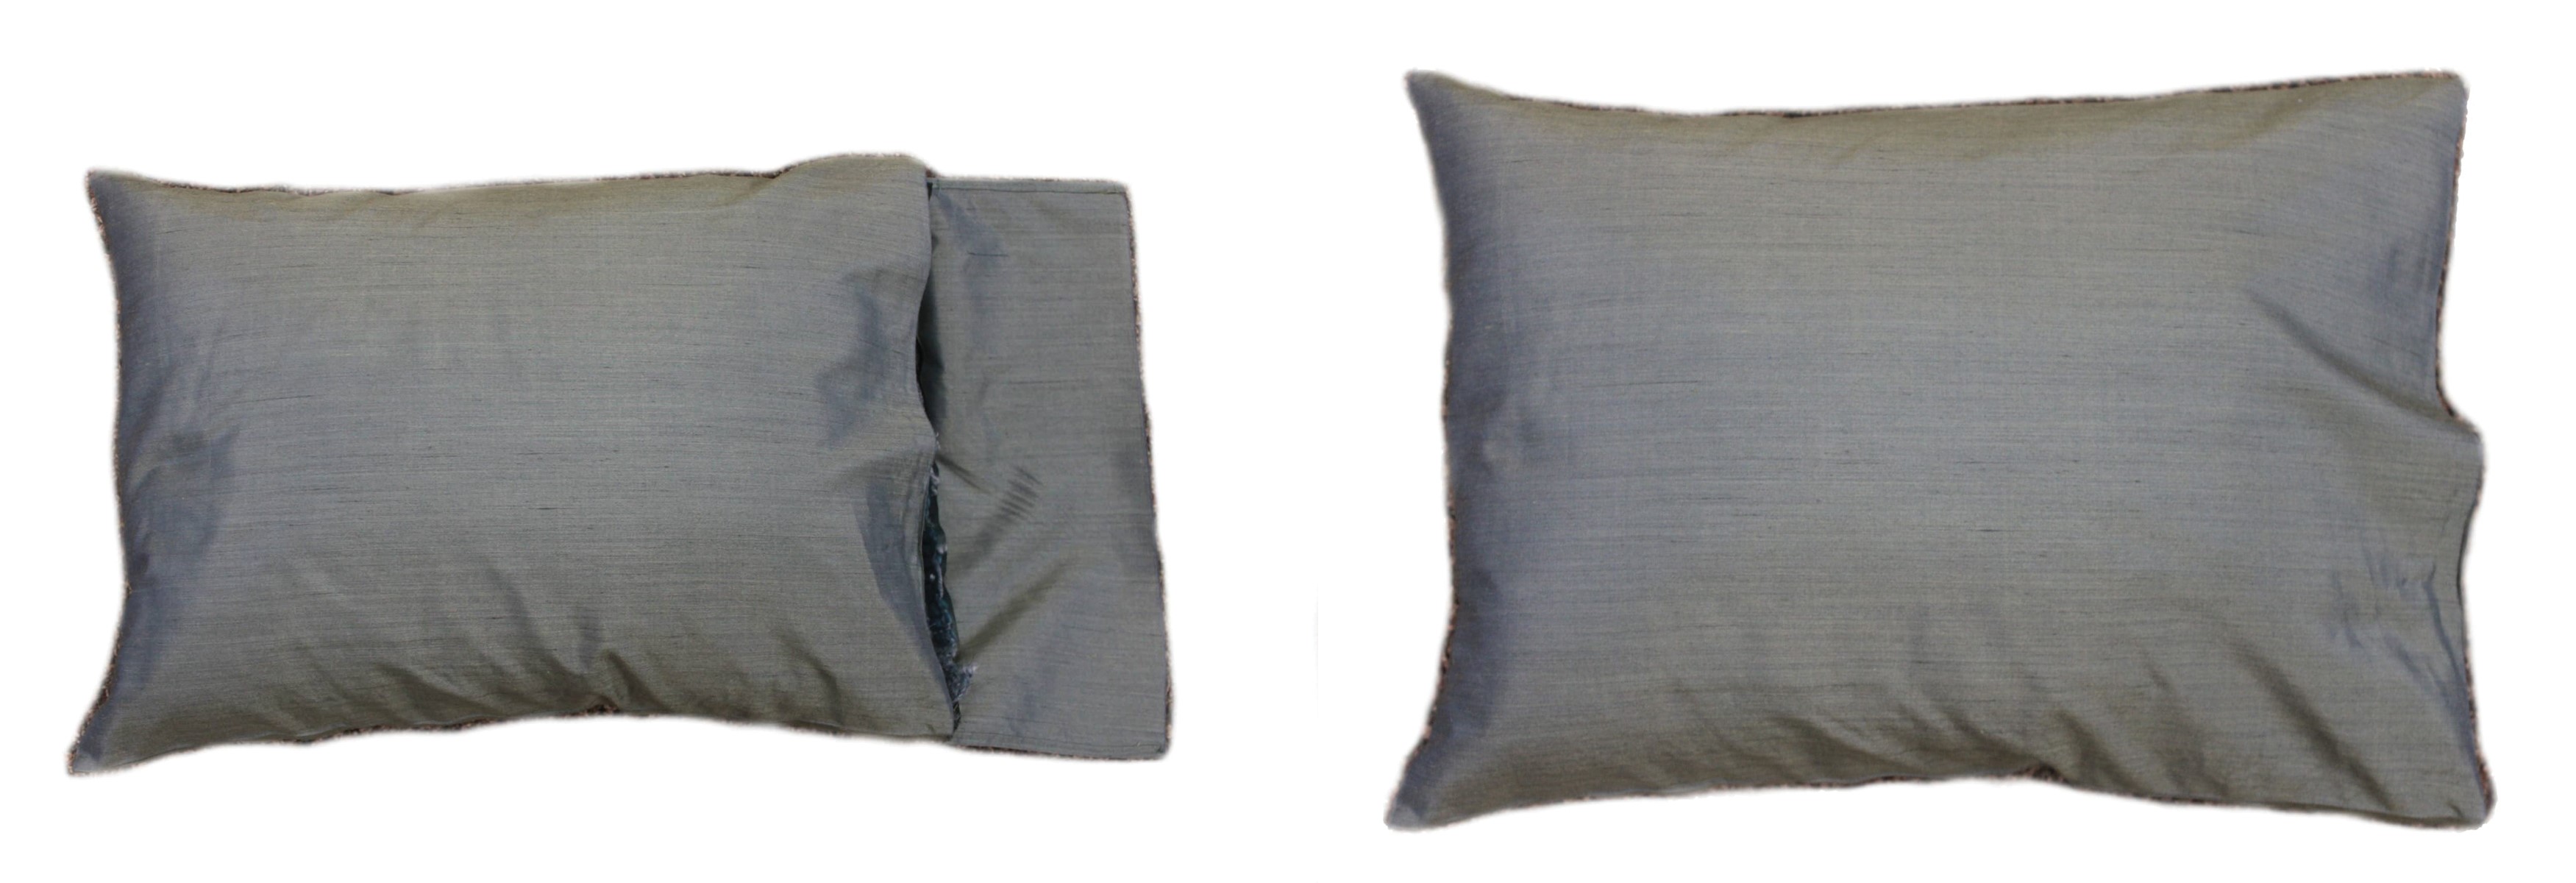
The 12” x 16” pillow form determined the dimensions of the top, bottom and back fabric dimensions. On the woven fabric, I did a couple of quick stabilizing stitches with the sewing machine before cutting it to size. A ½” seam allowance was used throughout and I opted for an envelope style pillow for easy insertion. At one end, on the back, I used the fabric selvedge edge for the large back piece as well as a 5” flap to tuck into the pillow. This made for clean edges and eliminated sewing hems.

For me, this exercise has resulted in more than a pillow. It has made me much more resolute in creating with precious elements now and embracing deserved decadence. The “magic” of what was going on behind the scenes brought great joy. And, the final piece (pieces actually—two more to finish*) will be welcome additions to the bedroom.
*One will feature the intended front.

