Twill Striped Linen Top
Designed by Melissa Ludden Hankens
If by chance you happen to follow me on Instagram, you know that I am fond of weaving fabric to create clothing. This project is an introduction on how to use your 4-shaft loom, in my case a Baby Wolf, to create a simple patterned cloth for a basic top or tunic.
For this project, I wove a single length of fabric and then cut it into two pieces, one forming the left side of the garment, and the other forming the right. I have provided the dimensions of the top I created, and offer suggestions as to how to adjust the sizing. Please make adjustments to the width and length of your warp depending on the width and length of your desired top. Also, keep in mind that you and I may not produce exactly the same cloth even under the same conditions with the same yarn. When in doubt, sample!
Here we go!
Project Specs
Width in reed: 11.7"
Number of warp ends: 280 (I’ll walk you through making adjustments to the sizing.) Since you will be weaving a twill structure, you might want to use a floating selvedge to make sure that the outside threads are caught with each pass. If you do this, add 2 more threads, 1 at each selvedge.
Warp length: 4 yards (again, you may want to alter this if you want a shorter or longer top).
EPI: 24
What You'll Need
-
about 2,300 yards of linen or hemp yarn to achieve a sett of 24 ends per inch—you may need more or less if you make adjustments to the size of the top. I used Valley Yarns 16/2 unbleached linen. I indigo dyed about 640 yards for the warp stripes.
Two other excellent options for yarn are Lunatic Fringe hemp yarn, which takes dye beautifully and also comes in an array of colors (see their listing for Firefly Hemp for color options), and Gist linen which also comes in many beautiful colors.
-
4-shaft loom with at least 12” weaving width
-
sewing machine
-
needle and sewing thread to match fabric—your thread will be visible. I used a color to match the unbleached linen.
Materials
Equipment
Directions
How to Make Adjustments to Your Garment
Since this top is made with two pieces of cloth, there are no real sleeves, just a bit of a cap sleeve formed by the fabric at the shoulder. My goal was a shirt that hit about hip length. Based on notes I have taken on previous projects, (Start a project notebook if you haven’t already!! It will be SO useful to you in the long run!) I started with a 4-yard warp sett at 24 ends per inch with 280 ends for a width in reed of 11.7”. This yielded about 3 yards of 10-1/2” wide usable fabric post-wash. I ended up cutting about 8” from my finished length of fabric and the end result is a shirt that measures 24” from top to bottom and 21” from left to right with generously folded hems. To determine the size of your top or tunic, it is helpful to take a similar shirt from your wardrobe and measure its length and width for reference. When choosing a shirt to measure, keep in mind that your handwoven fabric will not stretch. It would be a tragedy to create a beautiful shirt that won’t fit over your shoulders!
Here is a quick overview of how to adjust the width-wise sizing of your top. Let’s say you are aiming to create a top that is 23” wide when flat. This means you need an extra 2” in width, post wash. Since you will be sewing two panels together to create this width, you only need to add one inch to your warp width, plus an extra couple of ends to account for shrinkage. At 24 ends per inch, you would thus need 24 + 2 additional warp threads for a total of (280+24+2=306 ends).
To add length to your top, increase the length of your warp. You may find it easier to do this in yard increments, but you can also make a custom path on your warping board that gives you a more accurate length. Since you are weaving one single length of fabric, you will have four cut ends to manage on your top—two will end up across the front and two across the back.
If you want to add 3” to the length of your top, you will need to do this times four, once for each panel end (3*4=12”). You can shorten the top using the same logic. When adding length, be sure to consider your hips and derriere. You may need to adjust the width if you are curvier on the bottom than the top or want a looser fit. You can also incorporate a longer side opening at the hip to create some ease.
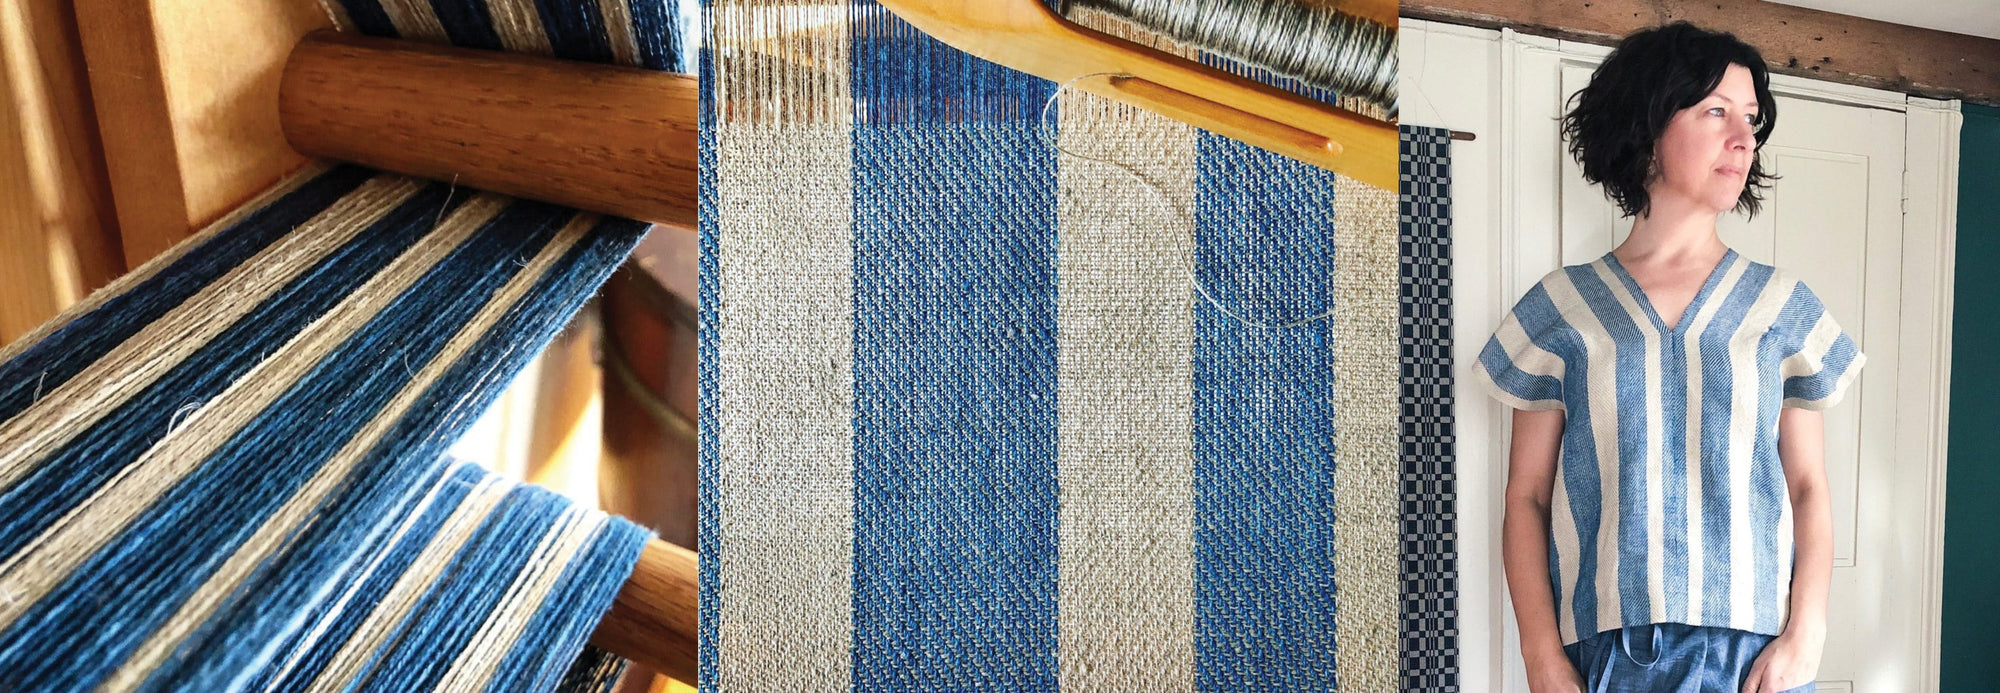
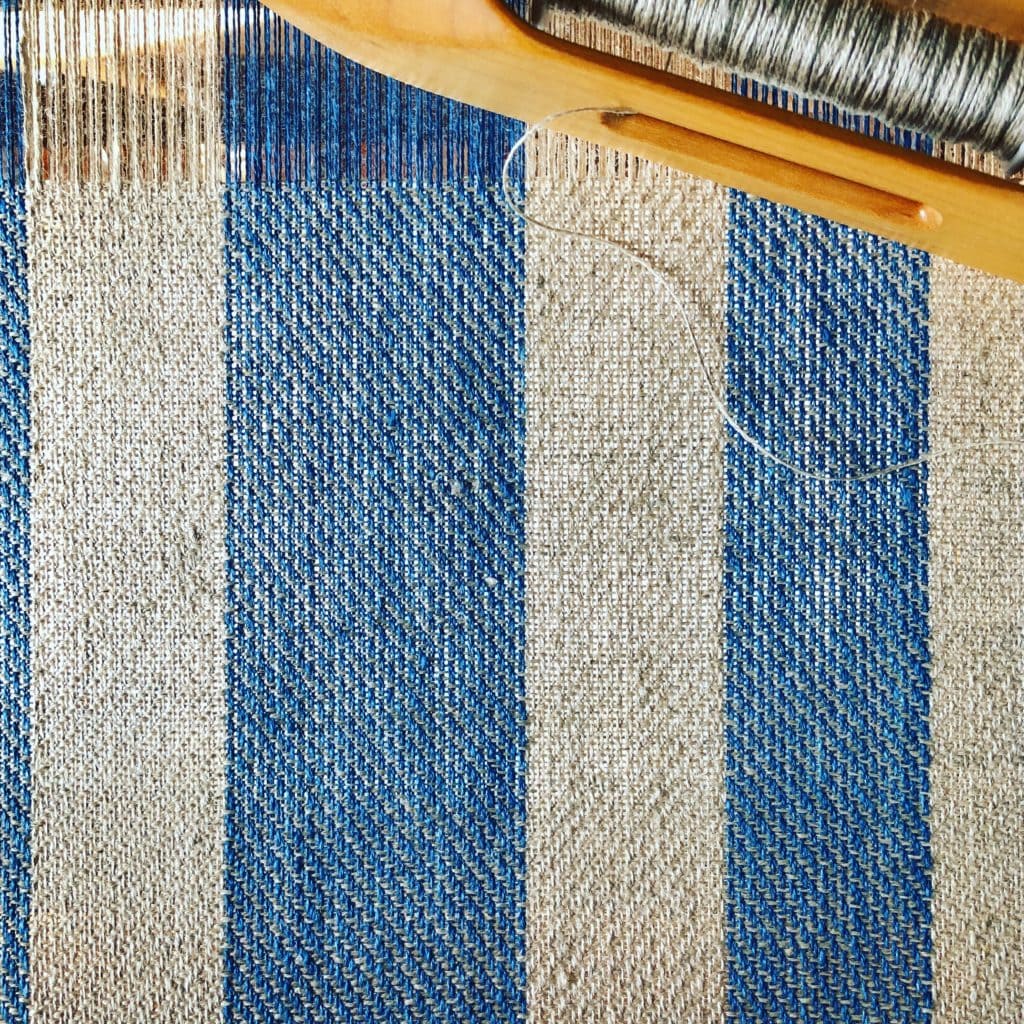
The weave structure for this fabric is a 2-2 point twill. The 2-2 indicates that each thread in both the warp and the weft travels over two threads and then under two threads. Point twill is simply a twill pattern that reverses direction—for example a threading of 1,2,3,4,3,2,1. I alternated the direction of the twill when the color of the warp stripe changed.
Here is my stripe pattern—280 threads alternating between natural linen and indigo dyed linen: 20 linen-40 indigo-40 linen-60 indigo-40 linen-40 indigo-20 linen-20 indigo
Using the example of a 23”-wide top, which requires 306 ends, you need to add 26 threads to this pattern. You can do this however you like. Add another stripe measuring 26 threads wide, parse them out over the width of the fabric, or create your own stripe pattern.
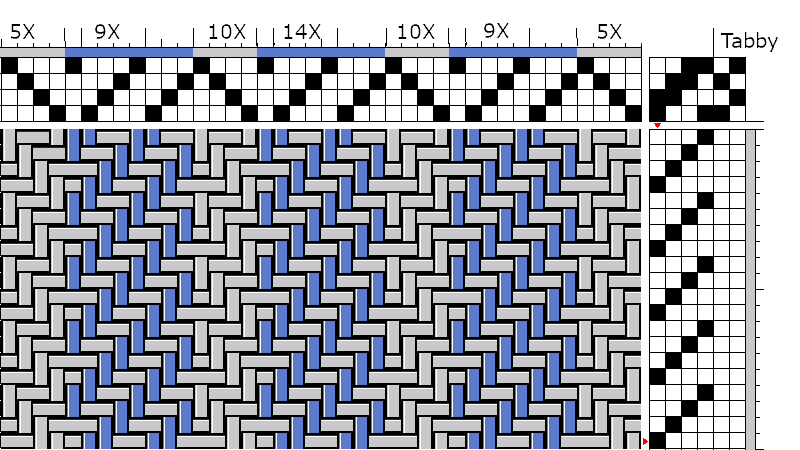
So how does this work when it comes to threading? It is thankfully straightforward. Thread your loom straight draw through the first stripe. In my case the first 20 threads are natural linen, and I would thread them as follows:
1-2-3-4-1-2-3-4-1-2-3-4-1-2-3-4-1-2-3-4
The next thread is blue, so here you will reverse your twill and start threading as follows:
3-2-1-4-3-2-1-4-3-2-1-4-3-2-1-4-3-2-1-4-3-2-1-4-3-2-1-4-3-2-1-4-3-2-1-4-3-2-1-4
Your last thread ends at 4, so what happens next? You reverse your twill again and head back to 1-2-3-4 through your next stripe and so on. Don’t worry about reversing your twill mid-sequence. If you end on a 3, you either reverse direction to a 2 or a 4.
Warping and Weaving
- With a bast fiber like linen or hemp, there is little to no stretch in the threads. This means that you need to take extra care when winding on and tying on your warp.
- A few times a year, I give my Baby Wolf a once over. I check to make sure that the hardware holding her together is tightened. Inevitably, as the humidity drops here in Massachusetts with the coming of winter, things loosen up. A well-tuned loom is your friend.
- As you are winding your warp, pause frequently to pull out the slack. I’m a front to back warper, so for me this means sitting on my bench, putting two feet up on the cloth beam supports, grabbing the warp threads in two hands, and pulling slowly but strongly using my feet to brace the loom. Don’t be shy here! Really give it your all, but don’t tug sharply.
- I use a corrugated cardboard roll to separate my warp as it is winding on. You want to be sure you are using a sturdy material that won’t distort under tension.
- Once my warp is tied on, I always weave at least an inch of cloth before leaving the loom. I like to work out any tension issues before I walk away so that I’m ready to weave when I sit back down again.
- Your tie-up is simple. Treadle 1 raises shafts 1 and 2, treadle 2 raises shafts 2 and 3, treadle 3 raises shafts 3 and 4, and treadle 4 raises shafts 1 and 4. The fabric I created was woven with a simple 1-2-3-4 repeated treadling for the entire length of the fabric. Table loom weavers should pull the corresponding levers. I typically begin weaving with my shuttle in my right hand, and I like to work on opposites when possible. This means that I tie up treadles one and three to work with my left foot and treadles two and four to work with my right.
- And now it’s time to weave away! I love listening to the Gist Yarn Podcast https://www.gistyarn.com/pages/weave-podcast while I weave. Episode 46 features our own Barry and Jane, but so many amazing weavers have been interviewed.
Finishing and Assembly
Once you have woven your cloth, cut it from the loom, machine stitch across the cut edges to prevent raveling, and trim the excess waste yarn. When I have a long length of fabric like this, I hand wash it, air dry it, and then put it in the dryer on a timed cycle with heat for 10–20 minutes to soften and settle into itself.
Finishing and Assembly
You will need your sewing machine one more time. Find the midpoint of your length of cloth, machine sew two straight stitches across the entire width, one on either side of the midpoint with enough space between them to allow you to cut the fabric in two. Cut your fabric between the two rows of stitching. Eek! If it’s your first time cutting into your handwoven fabric, I feel you! It can be a little bit painful, but the end result will be worth it!
- Hand sewing. Don’t be intimidated! Decide which selvedges you want to join together. I wanted an indigo stripe down the center of my top, so I started my sewing by placing the two indigo selvedges together, right sides in. My fabric didn’t have a right or wrong side, but I assigned one for consistency. This also helps to disguise your hand sewing.
- Using a doubled thread and a needle, sew the two panels together by picking up the outer threads along each selvedge about every other weft thread. Sewing this way allows you to create a larger panel of fabric without a bulky seam.
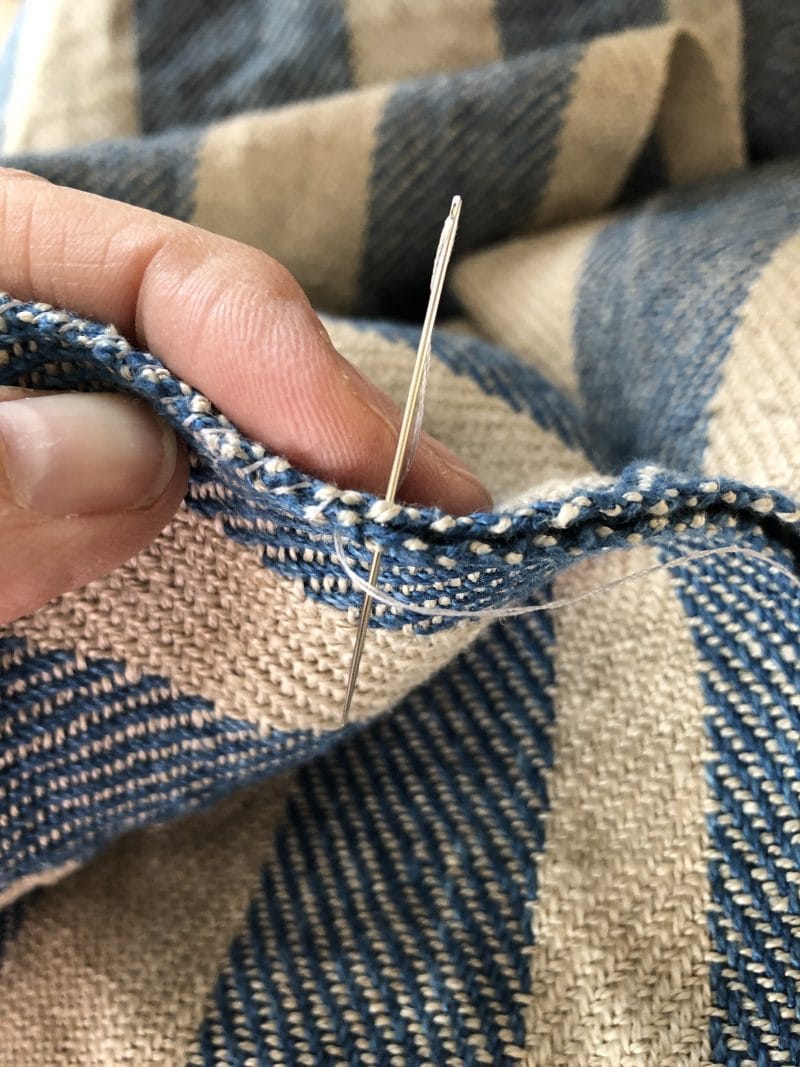
- With hand sewing, you want to work with short lengths of thread to prevent tangling. For example, I hold the spool at my sternum, and draw out a length of thread as far as one arm will span. Once doubled in the needle, it is a manageable length. After threading my needle, I sew up the front seam until I’m out of thread, and then repeat this for the back. This length of sewing is typically shorter than my final seam, but you may want to pay attention as you sew not to go too far until you’ve tried your top on.
- Center seams are 15” in the front and 16” in the back. This does not include the hems. You can adjust the seam lengths depending on your body type and personal preferences. Try your top on as often as you’d like during this process. Before finishing the front and back seams, sew the side seams together to get a better sense of the fit. The sample top has 10”-wide arm openings and 3 ½”-long openings at the left and right hip. This means that each side seam is 10 ½”.
- Start from the armpit, reinforcing your sewing at this stress point, and stitch down the side. It may help to now iron and pin your hems to get an overall sense of proportion. Once your side seams are stitched, again, reinforcing the stitching at the bottom, you can sew your bottom hems. I like my front hem to be just a bit higher than my back hem. With this shirt, the difference was ½”.
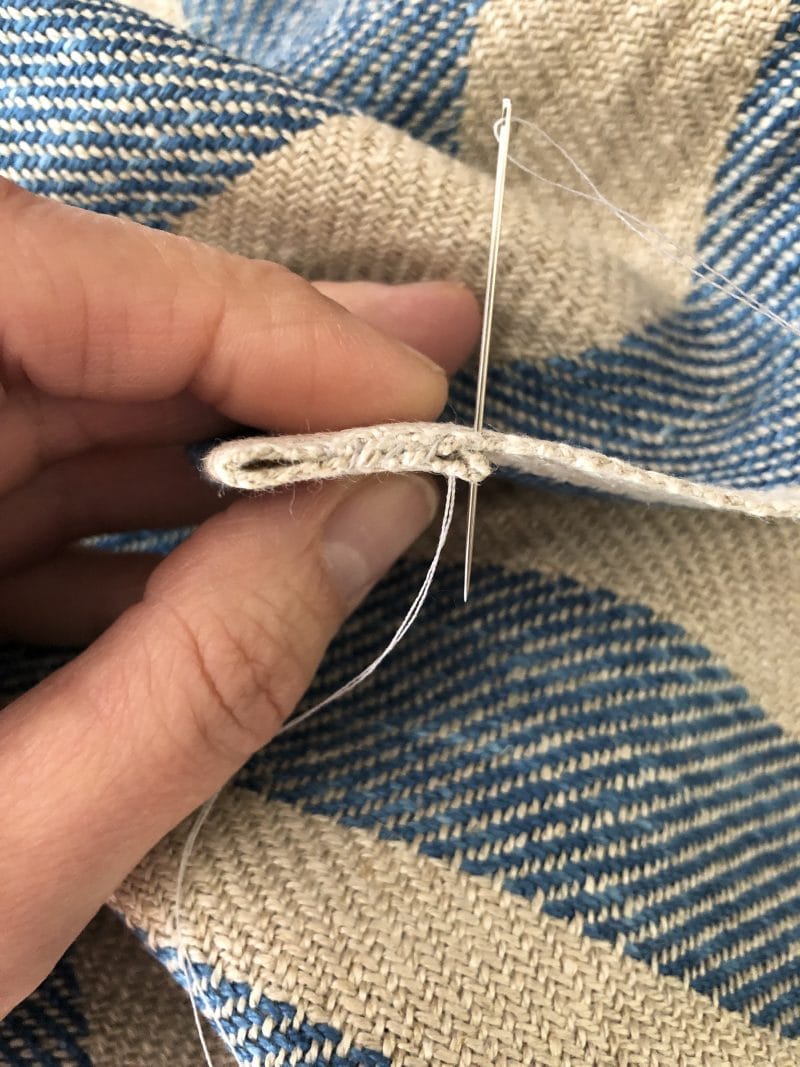
You should now have a top with the bottom hemmed and the side seams stitched. Finish sewing your center front and center back seams, reinforcing the stitching at the neck. Iron the seams flat, and you’re ready to go! Tag me on Instagram #mlhankens so that I can see your beautiful work, and as always, I’m happy to answer any questions you might have.

